Fresh Look for a French Country Secretary

Thank goodness for paint. Many pieces of furniture destined for the landfill have been saved by those of us who love to rescue such things, thanks to the miracle of paint. And once rescued, our treasures can be painted and re-painted as our homes change, our color pallets change or we move to a different home altogether. Such is the case in this post where my second-hand secretary got a new lease on life for the second time.

I paid $45 for this beauty at my local Habitat Restore several years ago. It was a little tattered, and the fretwork was so damaged that it couldn’t be saved. It also had a few pieces that needed to be re-glued, but ohhhhh how I loved this piece of furniture!

French Country Secretary/HomeStagingBloomingtonIL.wordpress.com

It was a clear choice for me to paint it black after I originally brought it home since it was going to live next to my black kitchen table. I loved how sophisticated and formal it looked. Here’s the piece after I painted it black. It was beautiful!

Google Drive Image

Now we fast forward. I moved to a different home where I wanted to create a more relaxed atmosphere, and after several months of indecision, and switching to a curb-find kitchen table that I painted white, I decided the time had come for the secretary to become white too. If I hated it, I could always paint it black again. Right?

I love stripes when it comes to interior design. Stripes on walls, stripes on furniture and stripes on upholstery just make my heart sing! So my makeover had to involve stripes. I love the calmness of French Country design, and I wanted something subtle for this piece of furniture.  My goal was to remove it from its just-another-painted-secretary status.

I painted it White Duck by Sherwin Williams, but I wanted to leave the interior black for contrast for my white dishes. There was a chance this piece might end up in my bedroom at some point, and my bedroom furniture is also White Duck. That made the main color choice an easy one.

French Country Secretary/HomeStagingBloomingtonIL.wordpress.com

Now for the stripes. Grain sack stripes are my new-found love, so I searched the internet for dimensions that would be appropriate, although there are different styles of this type of stripe. I had zero luck finding measurements, so I played around with some printer paper and tape to come up with stripes that felt right to me.  So for those of you who would like a guide, I ended up using a 2″ stripe down the center, a 3/4″ space on both sides of the large stripe, and then I decided on 1/2″ stripes on the outer edges. Here are my samples—neither of which I used, but you get the idea.

French Country Secretary/HomeStagingBloomingtonIL.wordpress.com

I wanted to add some stenciling in addition to the stripes, and since I didn’t want to experiment with a design directly on the secretary, I made a mock-up out of cardboard. First I cut the cardboard to the size of the area of the desk I was wanting to paint, and then I painted it White Duck. I then drew the lines for my stripes.

French Country Secretary/HomeStagingBloomingtonIL.wordpress.com

I needed three different shades of a similar color for my design, so I chose light, medium and dark colors from my SW Color-to-go samples. If I had used only one color for all three areas, some of the areas would have disappeared where parts of the design overlapped. You’ll see what I mean in a minute.

French Country Secretary/HomeStagingBloomingtonIL.wordpress.com

I painted the stripes on my cardboard with the medium shade (SW Agreeable Gray) without taping them off, but when I painted the actual furniture, I used green frog tape to get nice, straight lines with no bleed-through. I must admit when my skeptical self first heard about frog tape, I thought it was just a gimmick to get people to spend more money since it’s pretty pricey. But after using it, I highly recommend it because it’s much better for striping than regular blue painter’s tape.

French Country Secretary/HomeStagingBloomingtonIL.wordpress.com

I then started stenciling. I only wanted to use certain parts of the stencils, so I put tape over the parts I didn’t want transferred. I used the lightest shade for the vines (SW Worldly Gray).

French Country Secretary/HomeStagingBloomingtonIL.wordpress.com

French Country Secretary/HomeStagingBloomingtonIL.wordpress.com

So here’s what I had after adding my first stencil.

French Country Secretary/HomeStagingBloomingtonIL.wordpress.com

And for the second stencil that I purchased at Michael’s, I used the darkest color (SW Anew Gray). This step makes it more obvious why I couldn’t use just one color for this project. You can see in the next photo, how my stencil overlaps my stripes. If I had stenciled the letters in the same color as the stripes, the letters would have disappeared.

French Country Secretary/HomeStagingBloomingtonIL.wordpress.com

French Country Secretary/HomeStagingBloomingtonIL.wordpress.com

After I finished, I taped the cardboard sample to the desk to see if everything looked the way I wanted it to. Yep. Good to go!

French Country Secretary/HomeStagingBloomingtonIL.wordpress.com

Now I was ready! I repeated all these steps again, but on the actual piece of furniture this time.

 French Country Secretary/HomeStagingBloomingtonIL.wordpress.com

 French Country Secretary/HomeStagingBloomingtonIL.wordpress.com

I loved this piece painted black, but it’s more appropriately painted white in the less formal style of my current home.

 French Country Secretary/HomeStagingBloomingtonIL.wordpress.com

 French Country Secretary/HomeStagingBloomingtonIL.wordpress.com

Unfortunately, the decorative painting doesn’t show up too well in the photographs taken from farther away, but I hope you can see well enough in the close ups to get the idea.

 French Country Secretary/HomeStagingBloomingtonIL.wordpress.com

 French Country Secretary/HomeStagingBloomingtonIL.wordpress.com

 French Country Secretary/HomeStagingBloomingtonIL.wordpress.com

It’s amazing how changing the color of this piece from black to white brightens up the space. I also re-painted an armoire from black to white at the same time I painted the secretary, but haven’t jazzed it up just yet. More about that one later…

This post was written by Tracy Evans who is a Journeyman Painter and Certified Home Stager/Redesigner. If you enjoy gardening, you may want to pay a visit to her gardening blog at MyUrbanGardenOasis.Wordpress.com.

Making the Best Use of Space in a Tiny Laundry Room

Welcome to my odd-but-lovable little laundry room. The smallest room in my house used to be the biggest disaster, but not anymore!

Here are photos of how the laundry room looked right before I moved in. It measures a cozy  4′ x 12′. I suppose it’s actually more of a laundry hall than a laundry room, and the washing machine and the dryer sit across the room from each other instead of next to each other. I wasn’t kidding about the odd part.

 Making the Best Use of Space in a Tiny Laundry Room/HomeStagingBloomingtonIL.wordpress.com

 Making the Best Use of Space in a Tiny Laundry Room/HomeStagingBloomingtonIL.wordpress.com

Here’s the dumping ground my laundry room became shortly after moving in. It went from odd, to odd and messy. This is the first room I see as I enter my house from the garage—not exactly a welcoming greeting at the end of the day.

 Making the Best Use of Space in a Tiny Laundry Room/HomeStagingBloomingtonIL.wordpress.com

 Making the Best Use of Space in a Tiny Laundry Room/HomeStagingBloomingtonIL.wordpress.com

I needed some small-space ideas, so I turned to Pinterest for advice. Funny thing—when I searched “Small laundry rooms” I ended up with pictures of beautiful laundry retreats with farmhouse sinks, dog washing stations and crystal chandeliers. Clearly my odd little laundry hall was never going to look like that, but I knew it could be better.

My “must have” list included lots of storage, a brighter space, a clothes-drying rack, easy access to my laundry detergent,  a space to sort clothes and a place to hang coats.  But most important, I needed it to be beautiful. That’s a tall order for a tiny space.

I was able to re-use leftover cabinets from my kitchen remodel for this project, but garage sales, Habitat for Humanity Restores and even your local curbs are great places to snag some second-hand cabinets. The only new cabinet I had to buy for this project was a pantry-type cabinet.

I began by drawing sketches on graph paper of different ways to combine the cabinets I had on hand to make them fit into the space. It was basically a large-scale game of Tetris. First, one cabinet was stacked on top of another on the dryer side of the room by my oh-so-wonderful carpenter brother, Mike.

Making the Best Use of Space in a Tiny Laundry Room/HomeStagingBloomingtonIL.wordpress.com

Another cabinet was added on the lower right. On the upper right, I simply added a face frame to that area for open display since I didn’t have a cabinet to fit that tiny space. Looks a little scary, I know.

 Making the Best Use of Space in a Tiny Laundry Room/HomeStagingBloomingtonIL.wordpress.com

On the washing machine side of the room, the store-bought pantry cabinet went on the left. I made a simple cabinet to go on the top of it for open display. Once the face frame was added to it, it blended right in with the other cabinets. I turned a cabinet sideways to go to on the upper right, and added another cabinet below it.

 Making the Best Use of Space in a Tiny Laundry Room/HomeStagingBloomingtonIL.wordpress.com

If you look closely at this photo, you can see that I added a sheet of floor-to-ceiling beadboard to the side of the pantry cabinet to give the illusion that the pantry cabinet and the cabinet on top of it were one large piece.

 Making the Best Use of Space in a Tiny Laundry Room/HomeStagingBloomingtonIL.wordpress.com

I decided to make use of the awkward space between the two cabinets (above photo) by making shelves for that area. I put a small trim piece on the front of each shelf to beef them up a bit, and I added beadboard behind them for a little extra cuteness.

Making the Best Use of Space in a Tiny Laundry Room/HomeStagingBloomingtonIL.wordpress.com

 Making the Best Use of Space in a Tiny Laundry Room/HomeStagingBloomingtonIL.wordpress.com

It ended up being the perfect spot for my laundry detergent. Like a glove, as they say. Fingers crossed that Tide won’t change the size of their detergent bottles.

Making the Best Use of Space in a Tiny Laundry Room/HomeStagingBloomingtonIL.wordpress.com

 Making the Best Use of Space in a Tiny Laundry Room/HomeStagingBloomingtonIL.wordpress.com

So that the cabinets would look a little more updated, I added hidden hinges. The previous hinges were shiny silver ones. I could have kept them and spray-painted them white to help them blend in, but chose to go the hidden hinge route since that’s what was on the new pantry cabinet. See how I added the hidden hinges here.

 Making the Best Use of Space in a Tiny Laundry Room/HomeStagingBloomingtonIL.wordpress.com

My bro added some crown, I added some paint, and both sides of the room were looking better.

 Making the Best Use of Space in a Tiny Laundry Room/HomeStagingBloomingtonIL.wordpress.com

Now for the other side.

 Making the Best Use of Space in a Tiny Laundry Room/HomeStagingBloomingtonIL.wordpress.com

I had achieved both my storage wish and a special place for my laundry detergent, but I still had a ways to go. Next, I added some board and batten wainscoting. See tips here.

Before…
 Making the Best Use of Space in a Tiny Laundry Room/HomeStagingBloomingtonIL.wordpress.com

And after

Making the Best Use of Space in a Tiny Laundry Room/HomeStagingBloomingtonIL.wordpress.com

Before

 Making the Best Use of Space in a Tiny Laundry Room/HomeStagingBloomingtonIL.wordpress.com

After

 Making the Best Use of Space in a Tiny Laundry Room/HomeStagingBloomingtonIL.wordpress.com

I added these gorgeous knobs from Hobby Lobby to hang coats on. Another item off my checklist.

 Making the Best Use of Space in a Tiny Laundry Room/HomeStagingBloomingtonIL.wordpress.com

 Making the Best Use of Space in a Tiny Laundry Room/HomeStagingBloomingtonIL.wordpress.com

 Making the Best Use of Space in a Tiny Laundry Room/HomeStagingBloomingtonIL.wordpress.com

In addition to painting the cabinets and wainscoting white in order to lighten up the room, I also painted the walls a lighter color, and installed a new light fixture from Lowe’s. What a difference the light fixture made!

I’ve learned that in small, narrow, utilitarian spaces where good lighting is a must, you can’t beat directional lighting. The lights were directed towards the cabinets on each end of the room. Brighter laundry room—check!

 Making the Best Use of Space in a Tiny Laundry Room/HomeStagingBloomingtonIL.wordpress.com

I then installed this DIY drying rack. See how you can make one here.

Making the Best Use of Space in a Tiny Laundry Room/HomeStagingBloomingtonIL.wordpress.com

To satisfy my need for a place to sort laundry, I built this table the same height as my dryer. With the dryer and the table combined, I now have a small area to stack clean clothes. I built the table with legs made from old bedposts I found on a curb. Sometimes my curb shopping and hoarding come in handy! See details on construction here.

 Making the Best Use of Space in a Tiny Laundry Room/HomeStagingBloomingtonIL.wordpress.com

I added this small, removable shelf for a place to keep my car keys that are now easy to grab on my way out the door. The shelf isn’t screwed to the brackets underneath so that I have quick access to the water shut offs if need be.

 Making the Best Use of Space in a Tiny Laundry Room/HomeStagingBloomingtonIL.wordpress.com

My sister, Dee, who’s an amazing seamstress, made me this adorable hanging bag that has found the perfect home here in my little laundry room. Love, love, love that bird fabric!

 Making the Best Use of Space in a Tiny Laundry Room/HomeStagingBloomingtonIL.wordpress.com

My last wish was to have a beautiful space, and I believe I managed that too! Here are the before and after photos.

 Making the Best Use of Space in a Tiny Laundry Room/HomeStagingBloomingtonIL.wordpress.com

 Making the Best Use of Space in a Tiny Laundry Room/HomeStagingBloomingtonIL.wordpress.com

 Making the Best Use of Space in a Tiny Laundry Room/HomeStagingBloomingtonIL.wordpress.com

Making the Best Use of Space in a Tiny Laundry Room/HomeStagingBloomingtonIL.wordpress.com

Making the Best Use of Space in a Tiny Laundry Room/HomeStagingBloomingtonIL.wordpress.comg

Making the Best Use of Space in a Tiny Laundry Room/HomeStagingBloomingtonIL.wordpress.com

And here are some before and afters of the other side of the room.

 Making the Best Use of Space in a Tiny Laundry Room/HomeStagingBloomingtonIL.wordpress.com

 Making the Best Use of Space in a Tiny Laundry Room/HomeStagingBloomingtonIL.wordpress.com

Making the Best Use of Space in a Tiny Laundry Room/HomeStagingBloomingtonIL.wordpress.com

 Making the Best Use of Space in a Tiny Laundry Room/HomeStagingBloomingtonIL.wordpress.com

 Making the Best Use of Space in a Tiny Laundry Room/HomeStagingBloomingtonIL.wordpress.com

 Making the Best Use of Space in a Tiny Laundry Room/HomeStagingBloomingtonIL.wordpress.com

Now I actually smile when I come into my house at the end of the day!

This post was written by Tracy Evans who is a Journeyman Painter and Certified Home Stager/Redesigner. If you enjoy gardening, you may want to visit her gardening blog at MyUrbanGardenOasis.Wordpress.com.

Kitchen Re-do on a Budget

Small kitchen organization

When my realtor and I walked through the door of my current home for the first time, it became a contender right away. Then we went into the kitchen and…wait…what?! Kitchens are supposed to sell houses, but not this time. The kitchen was very 80’s, and very brown. Floors, cabinets, doors, trim and counter tops—all brown. It was so sad and dreary. I wasn’t too concerned because I knew a gallon of white paint on the cabinets would perk the space right up. But I didn’t realize how inefficient the kitchen actually was until after I moved in.

My kitchen is small. I can handle small. And at this stage of my life, I’m happy to report I actually prefer small. But I can’t handle disorganization and poor use of space. After a handful of projects that I’ll share with you here, I gained a functional, charming little kitchen for not a whole lot of money. Here’s the completed project.

Kitchen Re-do On a Budget/HomeStagingBloomingtonIL.wordpress.com

I wanted to keep as much of the existing kitchen as I could, and since the previous owners had just updated the counter tops, I decided to keep them. I also decided to keep and alter the majority of the lower cabinets.

Plan A was to try to find new white upper cabinets in the same style as my existing lowers, so I would only have to paint the lower kitchen cabinets. I wanted to replace the majority of the uppers in order to upgrade from 30″ cabinets to 42″. I managed to find a kitchen design center that carried cabinets that were a very close match to the existing base cabinets I wanted to keep. Unfortunately, they were only available in stained oak. Plan B—order brand new stained cabinets and paint the whole darn kitchen white.

While waiting for the new cabinets to arrive, I had several projects to tackle, one of which was filling the grain and painting the existing cabinets (See how here.). See what I mean about the dreary brown?

  Kitchen Re-do On a Budget/HomeStagingBloomigtonIL.wordpress.com

Things are looking a little brighter!

  Kitchen Re-do On a Budget/HomeStagingBloomigtonIL.wordpress.com

At this point, it just felt good to get the ball rolling.

  Kitchen Re-do On a Budget/HomeStagingBloomigtonIL.wordpress.com

Here’s a before photo of the other side of the kitchen.

  Kitchen Re-do On a Budget/HomeStagingBloomigtonIL.wordpress.com

Baby steps!

 Kitchen Re-do On a Budget/HomeStagingBloomigtonIL.wordpress.com

Another project was to beef up the “wood” peninsula. What a difference this made!
See details here.

  Kitchen Re-do On a Budget/HomeStagingBloomigtonIL.wordpress.com

  Kitchen Re-do On a Budget/HomeStagingBloomigtonIL.wordpress.com

  Kitchen Re-do On a Budget/HomeStagingBloomigtonIL.wordpress.com

Next to the stove, was a corner cabinet that had a very small door opening, but lots of space inside. I made the opening bigger by replacing the board to the left of the door with a smaller one. Then I made some pull out drawers for storage using the rolling hardware from some of the cabinets I removed, and from some scrap wood I had on hand. Gotta love free. I built a small shelf unit that tucked back inside the cabinet next to the drawers for storing seldom-used items. See that project here.

  Kitchen Re-do On a Budget/HomeStagingBloomigtonIL.wordpress.com

  Kitchen Re-do On a Budget/HomeStagingBloomigtonIL.wordpress.com

  Kitchen Re-do On a Budget/HomeStagingBloomigtonIL.wordpress.com

Once my cabinets arrived, the fun began! Many of the photos you’re going to see, will be before (old oak), during (new oak), and after (oak painted white).

First, I had the base cabinet next to the fridge swapped out for one with drawers. Drawers instead of doors are a much more efficient way to go. No more digging for pots and pans!

  Kitchen Re-do On a Budget/HomeStagingBloomigtonIL.wordpress.com

Here’s a picture of the “new” cabinet before painting.

  Kitchen Re-do On a Budget/HomeStagingBloomigtonIL.wordpress.com

And here’s the same cabinet painted and with hardware installed.

 Kitchen Re-do On a Budget/HomeStagingBloomigtonIL.wordpress.com

Ditto to the left of the stove—I had a base cabinet installed that had drawers instead of a door—and went from a tiny 12″ cabinet to a less-tiny 15″ cabinet. I don’t understand why a 12″ cabinet was put into a space big enough for a 15″ cabinet, but no matter. Since the old 12″ counter top was then too small for the new 15″ cabinet, I had my awesome carpenter brother, Mike cut down the counter top from the cabinet in the last photo to fit this one. I trimmed out this cabinet the same way I trimmed out the peninsula.

  Kitchen Re-do On a Budget/HomeStagingBloomigtonIL.wordpress.com

 Kitchen Re-do On a Budget/HomeStagingBloomigtonIL.wordpress.com

Another issue I had with trying to match the new cabinets to the originals was the change in hinges. My existing lower cabinets had visible hinges, and the new upper cabinets had hidden (Euro) hinges. That lead to another project of learning how to install hidden hinges. See how I did that here.

You can see the shiny hinges in the next photo, that I painted white in the second photo. But after my brother showed me the ropes on how to drill the cabinets for hidden hinges, I was able to get rid of the visible ones. After that, there was virtually no way to tell the new cabinets from the old ones. The last photo in this group of three was after the new hinges were installed. I opted for the soft-close hidden hinges, so no more slamming cabinet doors!

 Kitchen Re-do On a Budget/HomeStagingBloomingtonIL.wordpress.com

Kitchen Re-do On a Budget/HomeStagingBloomingtonIL.wordpress.com

Kitchen Re-do On a Budget/HomeStagingBloomingtonIL.wordpress.com

One of the first things I did to the upper cabinets was to ditch the decorative piece that ran in front of the window between the tops of my two upper cabinets. That opened things up right away. (You can see the piece I’m referring to in the next photo.) Bigger kitchens can handle those pieces, but in my kitchen, it’s just clutter. Be gone!

 Kitchen Re-do On a Budget/HomeStagingBloomingtonIL.wordpress.com

In order to use all the available space in my small kitchen, I decided to swap out the 30″ upper cabinets with 42″ cabinets. I was grateful that I didn’t have dry-walled soffits to contend with. I also ordered cabinets without those pesky stiles in the way. The easiest upper cabinet swap was the free-standing one in the next photo.

I had planned to install these cabinets myself, because I’d hung a few 30″ cabinets in a laundry room in a previous house myself without any trouble. But after seeing how massive a few of these cabinets were, I knew it was something I wouldn’t be able to do on my own. Little brother to the rescue…

Look at the difference between the puny original cabinets on the left and one of the new, taller cabinets on the right in the next photo.

 Kitchen Re-do On a Budget/HomeStagingBloomingtonIL.wordpress.com

So here’s the old cabinet.

Kitchen Re-do On a Budget/HomeStagingBloomingtonIL.wordpress.com

Here’s the replacement cabinet before painting.

 Kitchen Re-do On a Budget/HomeStagingBloomingtonIL.wordpress.com

And here it is painted out.

 Kitchen Re-do On a Budget/HomeStagingBloomingtonIL.wordpress.com

Next came the tiny cabinet over the fridge. It was replaced with one that was much larger than the old one.

Kitchen Re-do On a Budget/HomeStagingBloomingtonIL.wordpress.com

 Kitchen Re-do On a Budget/HomeStagingBloomingtonIL.wordpress.com

On my “to do” list is to build a divider of some sort to go inside this cabinet.

 Kitchen Re-do On a Budget/HomeStagingBloomingtonIL.wordpress.com

To the right of the fridge was this funky, mis-matched, cabinet-stacking wonder that I replaced with an open-shelving unit that I built to accommodate my everyday dishes. I made the counter top from wood I found curbside. The original counter top was the one we cut down and sacrificed for the cabinet to the left of the stove. See the open-shelving project here.

 Kitchen Re-do On a Budget/HomeStagingBloomingtonIL.wordpress.com

Kitchen Re-do On a Budget/HomeStagingBloomingtonIL.wordpress.com

Kitchen Re-do On a Budget/HomeStagingBloomingtonIL.wordpress.com

Now for the microwave/stove area. This took a lot of thought. This area was horribly inefficient. The cabinet to the right of the microwave had a door with only a 7″ opening. Not many kitchen items can fit into a 7″ opening, and there was a lot of blind storage space inside of that cabinet that I’d deemed unusable. I think this one was the winner for the worst cabinet in the kitchen.

Before…

 Kitchen Re-do On a Budget/HomeStagingBloomingtonIL.wordpress.com

And after.

Kitchen Re-do On a Budget/HomeStagingBloomingtonIL.wordpress.com

The cabinet to the left of the microwave was only a 12″ cabinet and wasn’t much better than that last one, and was also replaced with a 15″ cabinet.

 Kitchen Re-do On a Budget/HomeStagingBloomingtonIL.wordpress.com

 Kitchen Re-do On a Budget/HomeStagingBloomingtonIL.wordpress.com

The cabinet directly over the microwave was a bit of a mystery since there was a large filler strip underneath it that you can see in the photo below. By removing the filler strip and installing a cabinet that reached the ceiling, I gained a lot of extra storage space. This adjustment also raised the microwave a couple of inches which made for a bigger, brighter cooking surface on the stove top.

Here are before and after photos of that area.

 Kitchen Re-do On a Budget/HomeStagingBloomingtonIL.wordpress.com

 Kitchen Re-do On a Budget/HomeStagingBloomingtonIL.wordpress.com

I was then left with a 12″ space next to the cabinet to the right of the microwave that I filled with more open shelving. I made some corbels from scratch to support the shelves. The actual shelves were from the same curbside wood I used to make the counter top on the other side of the kitchen. It tied the two areas together nicely. See how I made the corbels and installed the shelving here.

 Kitchen Re-do On a Budget/HomeStagingBloomingtonIL.wordpress.com

 Kitchen Re-do On a Budget/HomeStagingBloomingtonIL.wordpress.com

Kitchen Re-do On a Budget/HomeStagingBloomingtonIL.wordpress.com

I used the same wide beadboard on the wall behind the corbel open shelving that I used on the back of the open shelving next to the fridge to further tie those two areas together.

Of course you can’t have a kitchen re-do without new hardware. So pretty!

 Kitchen Re-do On a Budget/HomeStagingBloomingtonIL.wordpress.com

 Kitchen Re-do On a Budget/HomeStagingBloomingtonIL.wordpress.com

Another project that helped this kitchen function better was a very DIY-friendly pantry door spice rack. See how to make one for yourself here.

 Kitchen Re-do On a Budget/HomeStagingBloomingtonIL.wordpress.com

 Kitchen Re-do On a Budget/HomeStagingBloomingtonIL.wordpress.com

I also added extra shelving inside the pantry so no space was wasted. I painted the shelves a crisp white, and what a difference! I swapped out the door, door casing and baseboard. I also permanently removed the door you see on the far right that leads to the laundry room. The two doors were constantly banging into each other. Note that the original pantry had only four shelves.

 Kitchen Re-do On a Budget/HomeStagingBloomingtonIL.wordpress.com

I added three additional shelves, but kept them shallow so items in the back are still easy to see and reach. I removed all of the original shelves and spaced them differently. I lowered the top shelf so there would be enough clearance for cereal boxes. The original bottom shelf was so high off the floor, that there was a lot of unused space in that area so I lowered that one as well. The second shelf from the bottom in the photo below, I made to be U-shaped to wrap around the side walls for easy access to my glass canisters.

 Kitchen Re-do On a Budget/HomeStagingBloomingtonIL.wordpress.com

I like to put the ends of my cabinets to work too. Here, I used one such area for cutting board storage, and love that they’re easily accessible.

 Kitchen Re-do On a Budget/HomeStagingBloomingtonILjpg.wordpress.com

It’s all in the details. We hear it all the time, and I’m a believer. Here are photos of the trim I added to the bottom of the cabinets. And I do these types of projects the old-fashioned way—a hammer, nails and a nail set/punch.

 Kitchen Re-do On a Budget/HomeStagingBloomingtonIL.wordpress.com

 Kitchen Re-do On a Budget/HomeStagingBloomingtonIL.wordpress.com

I went with a small crown molding (1.5″) since I swapped out my existing 30″ upper cabinets for 42″ ones. If I had used a larger crown, it would have dropped my cabinets too low, and the space between the counter tops and the bottom of the cabinets would have been too small. I give my brother all the credit here for the crown molding installation. I added a few pieces of crown after he left, and I must say, it wasn’t as easy as he said it was!

Kitchen Re-do On a Budget/HomeStagingBloomingtonIL.wordpress.com

 Kitchen Re-do On a Budget/HomeStagingBloomingtonIL.wordpress.com

And about that crown…I couldn’t find much information on the internet about the use of crown molding with 42″ cabinets, and I agonized over whether or not to do it. Unless you’ve got something tall that you must display on your counter top, there’s no reason why you can’t have a modest crown with 42″ cabinets. The space between my counter top and the bottom of my cabinets is just shy of 17″ instead of the “standard” 18, and I would do it again in a heartbeat. So if you’re contemplating whether or not to do this, I say go for it!

They do make a 36″ cabinet that allows for larger crown molding, but I wanted all the storage space I could get. And since my kitchen is small, I felt a more modest crown molding was appropriate anyway.

I decided to add some wall-frame wainscoting, some beadboard, a chair rail and a picture rail to the small, adjacent dining area. The trim I had already added to the bottom of the upper cabinets established the chair rail height. I hooked onto it using the same trim, and continued it onto the wall. I also continued the crown from the cabinets across this wall, but added an additional piece underneath the crown to make it a bit more substantial.

I marked out my master plan with painter’s tape so I would have an idea of what it would look like first. See how to install wall frame wainscoting here.

 Kitchen Re-do On a Budget/HomeStagingBloomingtonIL.wordpress.com

Kitchen Re-do On a Budget/HomeStagingBloomingtonIL.wordpress.com

Wainscoting Ideas/HomeStagingBloomingtonIL.wordpress.com

And here are a couple of close ups of the wainscoting/beadboard/picture rail.

 Kitchen Re-do On a Budget/HomeStagingBloomingtonIL.wordpress.com

 Kitchen Re-do On a Budget/HomeStagingBloomingtonIL.wordpress.com

I’m hoping to eventually find some wallpaper to put in the area above the picture rail. I painted a subtle stencil in that area for the time being.

 Kitchen Re-do On a Budget/HomeStagingBloomingtonIL.wordpress.com

To finish off the dining area, I decided to use a table that I found on a curb several years ago. Yes, ladies and gentleman, someone actually left this amazing table in pieces on a curb and threw a mattress over the top of it! But I found it. Ha! I gave away my store-bought table that I spent good money on, and decided to use my found treasure instead. A little white paint gave it some extra charm.

 Kitchen Re-do On a Budget/HomeStagingBloomingtonIL.wordpress.com

I discovered the chairs at a thrift shop, and they begged me like little lost puppies at a shelter to take them home. How could I refuse? I added a nice, thick cushion to them and re-covered them with some gorgeous fabric that my sis, Dee, discovered at Hobby Lobby. Here’s what the chairs looked like when I bought them.

 Kitchen Re-do On a Budget/HomeStagingBloomingtonIL.wordpress.com

And here’s a newly covered chair.

 Kitchen Re-do On a Budget/HomeStagingBloomingtonIL.wordpress.com

Now for some before and after photos.

 Kitchen Re-do On a Budget/HomeStagingBloomingtonIL.wordpress.com

 Kitchen Re-do On a Budget/HomeStagingBloomingtonIL.wordpress.com

 Kitchen Re-do On a Budget/HomeStagingBloomingtonIL.wordpress.com

 Kitchen Re-do On a Budget/HomeStagingBloomingtonIL.wordpress.com

Kitchen Re-do On a Budget/HomeStagingBloomingtonIL.wordpress.com

 Kitchen Re-do On a Budget/HomeStagingBloomingtonIL.wordpress.com

 Kitchen Re-do On a Budget/HomeStagingBloomingtonIL.wordpress.com

Kitchen Re-do On a Budget/ HomeStagingBloomingtonIL.wordpress.com

 Kitchen Re-do On a Budget/HomeStagingBloomingtonIL.wordpress.com

Kitchen Re-do On a Budget/HomeStagingBloomingtonIL.wordpress.com

This kitchen re-do was under $2000 (not including appliances and the new kitchen window), and the original cabinets I removed from the kitchen, were painted and used in my laundry room makeover–another post yet to come. So that $2000 actually transformed two rooms in my house.

I looked into getting a whole new kitchen, but I knew I would be just as happy with a more creative, less expensive approach that I could do myself…mostly. Nothing in this kitchen is high end. Nothing is fancy or trendy. It’s just simple, clean and beautiful. I got the bright, white kitchen I love, more storage and much better function on a small budget.

This post was written by Tracy Evans who is a Journeyman Painter and Certified Home Stager/Redesigner. If you enjoy gardening, you may want to visit her gardening blog at MyUrbanGardenOasis.Wordpress.com.

How to Remove Old Paint From Brick

How to remove paint from brick

Every day when I pulled my car into the garage, I cringed at the old, dried paint slopped onto the brick surrounding my garage door trim. The paint was out onto the brick by at least an inch in several places, and ran from the top of the door all the way to the ground. At least whoever did it was consistent.

How to Remove Old Paint from Brick/HomeStagingBloomingtonIL.Wordpress.com

Although I’m grateful to have a garage to park in and really shouldn’t complain, I paint for a living, and that made the situation especially painful. I had a hard time getting past the thought that it would have been real simple for the perpetrator to slap up a piece of tape onto the brick to protect it and save me some grief.

But the damage had been done, and since I’d hired someone to replace the rotting trim that you’ll see in the photos, it was time to put on my big girl panties and get to work. Procrastination time was over.

I must confess that I’d been avoiding this project because I didn’t have a lot of confidence that the paint was going to come off. It had been baking in the summer heat, and had prevailed through Central Illinois winters for at least two years, showing some kick-butt stubborn endurance.

So here’s how I got rid of the old paint. This is the product I used to get started.

 How to Remove Old Paint from Brick/HomeStagingBloomingtonIL.Wordpress.com

I also used a scraper, safety glasses, a rag, and the Mother of all handy tools—my Dremel. If you don’t own one of these little gems, you must buy one. Really. I use it all the time. It’s also worth spending a few extra dollars to buy a cordless one.

 How to Remove Old Paint from Brick/HomeStagingBloomingtonIL.Wordpress.com

Here’s the grinding stone bit I used.

 How to Remove Old Paint from Brick/HomeStagingBloomingtonIL.Wordpress.com

I put some Oops! on the paint first. It’s the consistency of water, so keep that in mind if you use it. I managed to get it on my hands a couple of times and it didn’t bother my skin, so that was a plus.

 How to Remove Old Paint from Brick/HomeStagingBloomingtonIL.Wordpress.com

Next I did minimal scraping just to get the thicker chunks of paint off. After scraping, I tried using a wire brush. It removed the paint, but it also turned the scrubbed area gray so I ditched that idea.

How to Remove Old Paint from Brick/HomeStagingBloomingtonIL.Wordpress.com

After deciding I didn’t like using the wire brush, I put on my safety glasses (of course), and starting using my Dremel on the softened paint. My brick isn’t real porous as far as brick goes, and it worked like a charm. The reasoning in using the Oops! and doing some scraping first was that I didn’t want to “goo” up my grinding stone with excessive amounts of paint.

How to Remove Old Paint from Brick/HomeStagingBloomingtonIL.Wordpress.com

I tried to take just the paint off (and the gray color left from the wire brush too) and not go too much into the surface of the brick. Even so, the areas where I used the Dremel left a slightly different color where the surface of the brick was removed.

Since I was desperate, I decided that even if it left a different color behind, I didn’t care. It was better than white globs of paint. You can see that the area right next to the white trim (in the photo below) where I used the Dremel looks lighter.

 How to Remove Old Paint from Brick/HomeStagingBloomingtonIL.Wordpress.com

But the good news is, when I rubbed the lighter area with a wet rag, it then turned back to the same color as the rest of the brick. And it wasn’t just because the brick was wet. It remained the same color as the rest of the brick even after it dried!! I’m not sure why that worked. I’m just glad it did.

 How to Remove Old Paint from Brick/HomeStagingBloomingtonIL.Wordpress.com

Unfortunately, I didn’t decide to blog about this until I had already finished the worst side of the garage, so the pictures I have aren’t as dramatic as the earlier brick I cleaned, but you get the idea.

Here are the before and after photos.

How to Remove Old Paint from Brick/HomeStagingBloomingtonIL.Wordpress.com

How to Remove Old Paint from Brick/HomeStagingBloomingtonIL.Wordpress.com

How to Remove Old Paint from Brick/HomeStagingBloomingtonIL.Wordpress.com

How to Remove Old Paint from Brick/HomeStagingBloomingtonIL.Wordpress.com

I can’t imagine doing this on a large expanse of brick, but for smaller mishaps it works pretty well.

Now I can smile when I put my car away, and I’ll be smiling even bigger when the rotted trim has been replaced!

This post was written by Tracy Evans who is a Journeyman Painter and Certified Home Stager/Redesigner. If you enjoy gardening, you may want to visit her gardening blog at MyUrbanGardenOasis.Wordpress.com.

Kitchen Open Shelving

DIY Kitchen Open Shelving

An area of my kitchen was in need of a makeover, thanks to the “resourcefulness” of one of my home’s previous owners. It looked as if they’d had one of those seemed-like-a-good-idea-at-the-time moments while attempting to add some additional storage space. Their creation was one that made me stand and stare for a moment while thinking, “Hmm. Really?”

That’s the same reaction most visitors had when seeing my kitchen for the first time. It amused me to watch the the “Hmm. Really?” look wash over their faces when they rounded the corner and saw it. The “it” was two mis-matched cabinets—one stuck to the underside of the other—in an area next to the fridge. Here it is. Now you can have the “look” too.

Kitchen Open Shelving/HomeStagingBloomingtonIL

I’m guessing a previous owner saw the “cabinet-stack” as a quick and easy storage solution. While I do respect their creativity and agree that the idea wasn’t all that bad, there were some obvious problems. The door styles didn’t match, the cabinets were made from two different types of wood, the stain colors didn’t match and one cabinet had exposed hinges, and the other had hidden hinges. And the doors were crooked. Yikes. It all had to go.

 Kitchen Open Shelving/HomeStagingBloomingtonIL

Since my kitchen is small, it was important to make the best possible use of space, and custom open shelving was the way to go. First, I must say that there should be a kitchen law that states any builder who installs 30″ upper cabinets (that don’t go all the way to the ceiling) in their kitchens should be thrown in the slammer. Upon release, they should be required to register as a kitchen offender. Thirty-inch cabinets in small kitchens are a bad idea because instead of storage, that full foot of unused open space above the cabinets is reduced to a dust-catcher.

I’ve heard the argument that an average-height person can’t reach the top shelf of a 42″ cabinet. There’s this thing called a step stool, and I’ll gladly use one in order to have a place to put seldom-used, but vital kitchen items like my waffle iron and my ice bucket that hasn’t been used since 1995. Needless to say, I was going all the way to the ceiling with my shelving unit.

Basically, I built a bookcase without a bottom shelf because I wanted the area to look “hutchy”. I agonized over how deep to make it. After all, this was my big chance to gain some extra inches, but I didn’t want the shelves so deep that it would look odd. I was trying to rid this kitchen of odd, after all. I decided to make the shelves 16″ deep, so I gained four inches of depth per shelf over the 12″ deep cabinets that were there previously. Here’s the shell assembled and painted.

 Kitchen Open Shelving/HomeStagingBloomingtonIL

The beauty in all of this is I was able to space the shelves to accommodate my personal stacks of plates, the height of my drinking glasses and the size of my mixing bowls that I planned to display.

I added beadboard backing for interest, but it also helped me to keep the project square.  I drove nails through the back of the beadboard and into each shelf to give added support so the shelves wouldn’t warp over time. I built the unit with 3/4″ plywood that was cut to size for me at Lowe’s. I made it about a half-inch smaller than the opening to allow for any wonkiness in the walls. Even so, it had to be “persuaded” into its new home, and was then attached to the studs in the wall behind it.

Since I knew I’d be sliding dishes across the shelves, I decided to use laminated shelving rather than painted plywood. That turned out to be a good decision. I’ll never have to re-paint the shelves or worry about paint scratching or rubbing off onto my glassware. Plus I have a bad habit of putting away dishes when they’re still wet. Not a problem with laminate!

I had a nicely-shaped piece of routed trim that was given to me by neighbors who knew I hoarded that sort of thing, so I used it to trim out the top of my shelves. My super-talented carpenter brother, Mike, cut it down to size for me. He removed the excess from the middle of the piece since both ends were tapered, and then used my Kreg Jig to join the two pieces back together. You can’t even tell he altered it. Genius.

 Kitchen Open Shelving/HomeStagingBloomingtonIL

 Kitchen Open Shelving/HomeStagingBloomingtonIL

Small kitchen. Small crown. I used a modest 2.5″ crown molding in addition to the very, very red trim piece (thank goodness for quality primer) for trimming out the upper part of the unit. It was the perfect size, and added presence without going overboard. I gotta be honest. My bro installed the majority of the crown molding in my kitchen. A carpenter I know (could’ve been my brother) said it’s not difficult to install. I disagree. Completely. I installed a couple of pieces and I’m grateful to whoever invented caulk. That’s all I’m gonna say.

I added fluted trim to the vertical sides, and had some smaller trim added to the front edge of the shelves to cover the rough plywood edges. And there you have it!

Kitchen Open Shelving/HomeStagingBloomingtonIL

I had the base cabinet swapped out so I could have drawers instead of doors. It’s much more efficient for pots and pans. I also made a counter top out of some re-claimed wood (aka, wood I found and “claimed” from a curb). So a big thank you to whoever abandoned it, and I love the stain color you chose! Note the change in the counter top in the next two photos.

Kitchen Open Shelving/HomeStagingBloomingtonIL

Kitchen Open Shelving/HomeStagingBloomingtonIL

I had to wait a few months for the back-ordered drawer pulls, but it was worth the wait. Love them!

Kitchen Open Shelving/HomeStagingBloomingtonIL

Now for the before and after photos. Note in the first “before” photo, that my silverware was stored on top of the counter. It lived there for a full year because the two small drawers in the original base cabinet weren’t wide enough for my silverware divider. Now I have a big-girl silverware drawer!

Kitchen Open Shelving/HomeStagingBloomingtonIL

Kitchen Open Shelving/HomeStagingBloomingtonIL

In the next two photos, you can see how the empty space above the cabinets went from dust-catcher to display space. So much better. I also swapped out the cabinet over the refrigerator with a deeper one.

Kitchen Open Shelving/HomeStagingBloomingtonIL

Kitchen Open Shelving/HomeStagingBloomingtonIL

Check out the charming penguin wine glasses in the next photo. They were purchased at a thrift store here in Central Illinois called “Two Sisters and a Warehouse”. A dear friend owns the shop that’s full of unique treasures. For more information, check out their website at www.TwoSistersAndAWarehouse.com.

Kitchen Open Shelving/HomeStagingBloomingtonIL

 Kitchen Open Shelving/HomeStagingBloomingtonIL

 Kitchen Open Shelving/HomeStagingBloomingtonIL

Here’s the whole area before and after. I changed out my door casing, baseboards, doors and door hardware, and swapped out my refrigerator for a stainless steel one.

 Kitchen Open Shelving/HomeStagingBloomingtonIL

 Kitchen Open Shelving/HomeStagingBloomingtonIL

I love being able to store my dishes within easy reach, and love that this shelving unit holds much more than any standard cabinet would have. It also cost a lot less than buying something manufactured. I’m also happier with my lighter, brighter kitchen.

 Kitchen Open Shelving/HomeStagingBloomingtonIL

More about the full kitchen remodel later!

This post was written by Tracy Evans who is a Journeyman Painter and Certified Home Stager/Redesigner. If you enjoy gardening, you may want to visit her gardening blog at MyUrbanGardenOasis.Wordpress.com.

DIY Laundry Room Drying Rack

Wall-mounted drying rack

I once built a wall-mounted clothes-drying rack that I loved. Then I moved. The drying rack stayed with the house, but as it turned out, the one I left behind wouldn’t have worked in my new laundry room anyway. So I built another one—completely different from the original one—that’s better suited to my current space, and here it is.

DIY Laundry Room Drying Rack/HomeStagingBloomingtonIL.Wordpress.com

If you’ve done some research on wall-mounted drying racks, you probably know that racks like these at Pottery Barn and other high-end retailers sell for anywhere from $100 on up. I recently saw one that sold for $350. Lordy. If you have a drill and a saw of some sort—even just a miter box—you can make one for yourself for much less. Much less.

You’ll need some wooden dowels, 1 x 2 pine, 1 x 3 pine and some beadboard that can be cut at your local box store if you don’t have a jig saw or table saw to cut it with.

 DIY Laundry Room Drying Rack/HomeStagingBloomingtonIL.Wordpress.com

I used mostly scrap wood for this project, as you can see by my chopped up beadboard. The size of my drying rack was based on the length of some wooden dowels I already had, as well as the size of my leftover beadboard piece.

The frame that held the dowels was made from 1 x 2’s. I made the dimensions of the inside of the frame 2″ shorter than the length of the wooden dowels so that the dowels could be inserted 1″ into the frame on each side.

 DIY Laundry Room Drying Rack/HomeStagingBloomingtonIL.Wordpress.com

I drew lines on the sides of my 1 x 2’s (on the one inch side) so I would know where to drill the holes for the dowels. You can decide what spacing works best for you, but I placed my dowels 3 1/4″ apart on center.

 DIY Laundry Room Drying Rack/HomeStagingBloomingtonIL.Wordpress.com

Drilling the holes in the trim was the most difficult part of this project because the wood I was drilling into wasn’t much wider than the dowels I was using. Here’s a photo of the finished frame, and there’s only about 1/8″ to 3/16″ of excess wood remaining on each side of the dowel. (Whew!) In the interest of frazzled-nerve prevention, you may want to consider your dowel thickness in comparison to the width of your frame pieces when you’re purchasing your supplies.

DIY Laundry Room Drying Rack/HomeStagingBloomingtonIL.Wordpress.com

You’ll want to use a spade bit or a brad point bit so the bit doesn’t “walk” while you’re trying to drill.

If you don’t know what a spade bit or a brad point bit is, the next photo shows a spade bit. If you don’t have much experience with a drill, you may want to drill a tiny hole first in the exact center of your piece of wood where you want the dowel to go. This gives you a “sturdy” place to put the tip of the actual dowel-sized bit for precision’s sake. You also may want to put a piece of tape on your bit as a depth guide so you don’t drill so deep that the point of the bit pokes through the other side. That would be very sad.

A brad point bit (google it) would have been the way to go here as the point on a brad point bit is much shorter than the point on a spade bit which means less chance of accidental “impalement”.

Unfortunately, I didn’t have the size I needed in a brad point, and I wasn’t going to make a trip out to get one when I was on a roll. I find having to leave for supplies in the middle of a project to be immensely irritating, so I usually make due with what I have.

 DIY Laundry Room Drying Rack/HomeStagingBloomingtonIL.Wordpress.com

 DIY Laundry Room Drying Rack/HomeStagingBloomingtonIL.Wordpress.com

I used a Kreg Jig to drill pocket holes in the frame that held the dowels, but you could easily make a frame without pocket holes by simply nailing or screwing these pieces together. I put glue in each dowel hole and on each butt joint of the frame.

Note: It’s easier to spray paint your dowels before assembling. I chose to spray paint mine with interior/exterior paint, so they’d be protected from the dampness of the wet clothing I’d be drying. Quite honestly, it would have been easier to prime and put one coat of paint on all of the pieces before assembly, and then one quick coat after assembly, but I wasn’t in a painting sort of mood. I will admit, I regretted said mood when I had to paint around all those dowels where they attached to the frame three times (one coat of primer and two coats of paint).

 DIY Laundry Room Drying Rack/HomeStagingBloomingtonIL.Wordpress.com

The second section of the drying rack consisted of trim pieces glued, and then nailed (from the back) to a piece of beadboard paneling. The trim size doesn’t really matter, but I would recommend something with a thickness that measures at least 1/2 inch because a nail will be driven through the side of it as you’ll see shortly. I used what I had on hand for this, which happened to be a combination of some leftover trim and some scraps of mull casing.

 DIY Laundry Room Drying Rack/HomeStagingBloomingtonIL.Wordpress.com

Next came a simple frame made from 1 x 3’s that surrounded the beadboard section. I screwed the four side pieces of the frame together, countersunk the screws, puttied over them and primed and painted all the pieces.

 DIY Laundry Room Drying Rack/HomeStagingBloomingtonIL.Wordpress.com
DIY Laundry Room Drying Rack/HomeStagingBloomingtonIL.Wordpress.com.

 DIY Laundry Room Drying Rack/HomeStagingBloomingtonIL.Wordpress.com

 DIY Laundry Room Drying Rack/HomeStagingBloomingtonIL.Wordpress.com

After I painted, I attached the 1 x 3 frame to the bead board section by nailing through the side of the frame and into the trim that was attached to the beadboard.

I added a piece of wire that I sprayed white, to allow the rack to hang open. The next two photos are of the back side of the frame.

DIY Laundry Room Drying Rack/HomeStagingBloomingtonIL.Wordpress.com

 DIY Laundry Room Drying Rack/HomeStagingBloomingtonIL.Wordpress.com

I added some white hooks to the back beadboard piece to catch the wire so the rack could be held in place when extended, and I added a pin that I salvaged off of who-knows-what, to hold the rack closed when not in use.

After a ridiculous amount of wishy-washyness, I decided not to hinge the two pieces together, so they remained two separate pieces. I didn’t like the idea of the pin part of hinges showing on the bottom of the rack, and I decided if I wanted to add hinges later, I could.

DIY Laundry Room Drying Rack/HomeStagingBloomingtonIL.Wordpress.com

DIY Laundry Room Drying Rack/HomeStagingBloomingtonIL.Wordpress.com

Here’s how the pin works when it’s all put together.

 DIY Laundry Room Drying Rack/HomeStagingBloomingtonIL.Wordpress.com

To mount it, I located the studs in the wall, and then drilled through the trim, the beadboard, the drywall and into the stud. I counter-sunk the screws and patched and painted over them. I hope nobody ever wants to remove this drying rack because finding the puttied and painted screws again is gonna be a son-of-a-gun.

Here’s the finished product.

DIY Laundry Room Drying Rack/HomeStagingBloomingtonIL.Wordpress.com

I must admit the original drying rack that I made and gave up for adoption was easier to build than this one—mainly because I didn’t have to drill any holes for dowels, and I only had to build one frame instead of two. It also was able to hold many more pieces of laundry than this one—even a queen sized comforter! But since becoming an empty-nester, my household laundry volume has taken a plunge, and now I mainly just need something for unmentionables, and a sweater or two. It’s perfect!

This post was written by Tracy Evans who is a Journeyman Painter and Certified Home Stager/Redesigner. If you enjoy gardening, you may want to visit her gardening blog at MyUrbanGardenOasis.Wordpress.com.

DIY Laundry Room Table

DIY Laundry Room Table

As part of my laundry room makeover, I needed to find a creative, functional way to fill an empty space next to my dryer. It was a smallish, awkward space that was too narrow for a pantry-type cabinet, so I decided a small table that I could use when I fold laundry would be the next best thing.

My laundry room is a bit odd because instead of having the washer and dryer side by side like the rest of the civilized world, mine are directly across from each other. So that awkward space that most people have between their washer and dryer, for me, happens to be between my dryer and the wall. Here’s the “dryer side” of my laundry room right before I moved in.

 DIY Laundry Room Table/HomeStagingBloomingtonIL

I realized there was a zero chance that I would find a table exactly the size I needed—16″ wide, 31″ deep and 39.5″ tall. Those were peculiar dimensions for a table, but I had a vision. And I knew the only way to get that table out of my head and into my laundry room was to build it myself. Thus my twenty-seven cent table was born.

My goal was to build a table that would fit snugly enough between the dryer and the wall that socks and undies couldn’t go AWOL. I wanted the table to be on wheels so I could slide it out easily if need be, but most of all, I just wanted the darn thing to be cute. Function doesn’t have to be ordinary.

Here are some of the materials I used to make the table. As always, I would like to point out that it pays to pull treasures off of curbs.

 DIY Laundry Room Table/HomeStagingBloomingtonIL

Bargain number one…I pulled the bed posts off of a curb a few years ago. They had decorative tape all over them. Some little girl was expressing herself I suppose. I got tired of peeling it off, so you can still see some of the stubborn pieces in the photos.

Bargain number two…the wheels. These were off of a butcher block kitchen cart I found next to a dumpster. I took it home and stripped it down like a car thief strips down cars for parts. You might scoff at that, but I got some pretty handsome wheels to show for it.

The plywood scrap, as well as some 2 x 4’s and other trim that you’ll see in future photos was all leftover from other projects.

Note that a bolt was missing from one of the ends of the bed posts in the last photo. I bought a new bolt and cut off the head with a hack saw to replace the missing one. There’s where my twenty-seven cents came in. It’s the only item I had to buy specifically to build this table. (I bought four bolts, but only ended up using one.)

I was going to begin this project by cutting the knobs off the ends of the bedposts so I would have a flat surface to attach the wheels to. As luck would have it, the knobs actually screwed right off! And the threads on my wheel brackets matched the threads on the metal pieces inside the bed posts so they screwed right in. It doesn’t get much simpler than that!

 DIY Laundry Room Table/HomeStagingBloomingtonIL

Now I have four little knobs for another project!

 DIY Laundry Room Table/HomeStagingBloomingtonIL

In order to make the table the correct height, and to have something to attach the bed posts/legs to, I added 2 x 4 blocks to the underside of the plywood. I measured where they needed to go and drew lines as a guide as to where to install them.

 DIY Laundry Room Table/HomeStagingBloomingtonIL

I’ve had these spiky threaded do-dads in my stash for so long that I don’t remember where I got them. I had no idea what they were used for, or what they were even called, until I looked online for ideas on how to attach legs to tables. They’re called t-nuts, and the threads inside the t-nuts were a perfect match with the threads that were inside the other ends of the bed posts.

 DIY Laundry Room Table/HomeStagingBloomingtonIL

After drilling holes into the wood blocks for the t-nuts, and pounding the them in, I screwed each block into the plywood top.

DIY Laundry Room Table/HomeStagingBloomingtonIL
 photo IMG_7509.jpg

Next I screwed the legs into the t-nuts.

 DIY Laundry Room Table/HomeStagingBloomingtonIL

 DIY Laundry Room Table/HomeStagingBloomingtonIL

Unfortunately the legs were a tad wobbly, so I added extra screws to them.

 DIY Laundry Room Table/HomeStagingBloomingtonIL

I flipped the table over and added some ripped down ship lap that was leftover from my screened porch. It covered all the ugliness going on underneath the table. (Note the nice shot of the blue zebra tape.)

 DIY Laundry Room Table/HomeStagingBloomingtonIL
DIY Laundry Room Table/HomeStagingBloomingtonIL

At this point, I primed the plywood top and the legs, but only after some deep breathing and determination to finally get rid of that last bit of tape!

 DIY Laundry Room Table/HomeStagingBloomingtonIL

To add a little more detail, I layered some door casing I had leftover from when I trimmed out my doors and windows on top of the ship lap.

 DIY Laundry Room Table/HomeStagingBloomingtonIL

Next, I added trim that was leftover from my kitchen remodel to cover the rough plywood edges.

 DIY Laundry Room Table/HomeStagingBloomingtonIL

I primed the trim and painted everything with two coats of paint, and my table was complete! Here she is.

DIY Laundry Room Table/HomeStagingBloomingtonIL

Now I no longer have an awkward space next to my dryer. I’ve got a place for some pretty flowers to add a little cheer to my laundry room, and I’ve got a spot for clean laundry when I’m folding.

 DIY Laundry Room Table/HomeStagingBloomingtonIL

One of these days, I’ll be posting my complete laundry room redo, so without giving away too much, here are my before and after photos.

 DIY Laundry Room Table/HomeStagingBloomingtonIL

 DIY Laundry Room Table/HomeStagingBloomingtonIL

Final thought…I realize you may be thinking, “Does she really think I’m gonna walk down the street and just happen to stumble across four bed posts that I can make a table with?” The answer is probably not (although it did happened to me *grin*). But you could pull legs off of a table purchased at your local Habitat Restore, thrift store, yard sale or yes, even from a free heap on the curb, to make a custom table to fit your space.

Be creative. Use your imagination. There are endless ideas on Pinterest and Google on how to create simple projects like this one to personalize your space and make it function for you. So get going!

This post was written by Tracy Evans who is a Journeyman Painter and Certified Home Stager/Redesigner. If you enjoy gardening, you may want to visit her gardening blog at MyUrbanGardenOasis.

DIY Corbels for Open Shelving

DIY corbel for kitchen open shelving

There’s something to be said for the ease of open shelving. It’s almost soothing to be able to see the familiar dishes you love, displayed in such a relaxed way. And I can vouch for the fact that storing dishes on open shelving makes unloading the dishwasher a smidge less painful. Just a smidge.

In a mini-makeover of my kitchen, I chose to fill two separate areas with open shelving. Not only are those areas now more visually appealing and more functional than if I had installed cabinetry, but they were also a less expensive option. One of the areas was done using corbels I made from scratch. Here’s the result.

 DIY Corbels for Open Shelving/HomeStagingBloomingtonIL.wordpress.com

Prior to this project, I’d been collecting photos of corbels from Pinterest that I thought I might be able to duplicate. One blogger’s corbels in particular, (Pretty Handy Girl) were an immediate favorite. And God Bless her for providing a pattern on her site. I stretched and altered her pattern to fit the dimensions I needed with the help of my genius son Ross, and “Snipping Tool” on my computer.

DIY Corbels for Open Shelving/HomeStagingBloommingtonIL.wordpress.com

I used graphite paper to transfer the pattern onto wood. Graphite paper resembles black tissue-paper, but has graphite on one side. I placed it between the pattern and the wood, and then traced over it with a painting stylus to transfer the design. (I had two different patterns going on here in the next few photos for those of you who are super-observant.)

 DIY Corbels for Open Shelving/HomeStagingBloommingtonIL.wordpress.com

Here are the patterns traced onto the wood pieces. I used 1″ stock from my stash for the thinner, more intricate side pieces, and 2″ stock for the thicker, simpler center piece. My 2″ stock was reclaimed wood (aka found on a curb).

 DIY Corbels for Open Shelving/HomeStagingBloommingtonIL.wordpress.com

Here are the pieces cut around the perimeters.

 DIY Corbels for Open Shelving/HomeStagingBloommingtonIL.wordpress.com

I have a scroll saw that I use for intricate inside cuts like these, but I don’t see why this couldn’t be accomplished with a jig saw using a very thin blade.

Regardless of the saw, holes need to be drilled in the wood pieces for the interior cuts. I drilled a hole near each area where I would have to switch blade direction. You can’t drill too many holes! If you don’t drill enough holes, it will be painfully obvious that you needed more when you’ve run your blade into a spot that you can’t wiggle your way out of—sort of like painting yourself into a corner.

 DIY Corbels for Open Shelving/HomeStagingBloommingtonIL.wordpress.com

 DIY Corbels for Open Shelving/HomeStagingBloommingtonIL.wordpress.com

Now we’re getting somewhere.

 DIY Corbels for Open Shelving/HomeStagingBloommingtonIL.wordpress.com

 DIY Corbels for Open Shelving/HomeStagingBloommingtonIL.wordpress.com

Since I had decided on three shelves, with the bottom shelf being smaller in depth than the top two, I decided to make the corbels different too. I designed the next set of corbels by melding a few different lovelies that I’d seen and liked, and I followed the same steps with those.

 DIY Corbels for Open Shelving/HomeStagingBloommingtonIL.wordpress.com

 DIY Corbels for Open Shelving/HomeStagingBloommingtonIL.wordpress.com

Since I wanted the corbels to look old, I distressed them. Step one is to rough up the wood. Make sure you’ve done enough of that before you stain because if you do any heavy distressing after you stain, the fresh, unstained wood will show through on the sanded areas.

Light-colored wood peeking through your paint would be a dead giveaway that the corbels aren’t authentic. So not only would you be discovered (*blush*), but you would also have to break out the stain again, and touch up your “tip-off” spots. The stain should dry several hours or overnight before painting.

 DIY Corbels for Open Shelving/HomeStagingBloommingtonIL.wordpress.com

I also cut and stained pieces to put underneath and on top of the corbels.

 DIY Corbels for Open Shelving/HomeStagingBloommingtonIL.wordpress.com

I then glued and nailed the main corbel pieces together. I only used one nail on each side, setting the nails with a punch. Since these are supposed to be old pieces, I chose not to fill the nail holes.

 DIY Corbels for Open Shelving/HomeStagingBloommingtonIL.wordpress.com

 DIY Corbels for Open Shelving/HomeStagingBloommingtonIL.wordpress.com

I randomly brushed some gray and some blue paint on the pieces because those were colors I wanted to show through the finish paint. They’re not all that attractive at this stage of the game.

 DIY Corbels for Open Shelving/HomeStagingBloommingtonIL.wordpress.com

I put a coat of white paint on next.

 DIY Corbels for Open Shelving/HomeStagingBloommingtonIL.wordpress.com

Since I wanted these to look like they had several layers of paint, I added some joint compound and after it was completely dry, I added another coat of white paint.

 DIY Corbels for Open Shelving/HomeStagingBloommingtonIL.wordpress.com

 DIY Corbels for Open Shelving/HomeStagingBloommingtonIL.wordpress.com

After letting the white paint dry overnight, I scraped some of the paint back off with the help of a heat gun. If you don’t let the paint dry enough, you’ll end up just smearing the paint as it melts rather than scraping it off as it softens.

I learned that the hard way so you don’t have to. Once you’ve smeared the paint by doing it too soon, you’re not going to be able to get back down to the stained wood because the wood absorbs the soft, melted mess that was once paint, and your stain will be forever buried.

 DIY Corbels for Open Shelving/HomeStagingBloommingtonIL.wordpress.com

 DIY Corbels for Open Shelving/HomeStagingBloommingtonIL.wordpress.com

Now for the install. After much deliberation, and a consultation with my super-smart carpenter brother, Mike, I conceded to the use of cleats. The studs were nowhere near where I needed them to be in order to install the corbels into them, so my only alternative was to screw cleats into the studs. Since these shelves were being installed in a corner, I took my cleats onto the adjacent wall for added stability.

I didn’t want to use cleats originally, but once I got them up, I was glad I did. Not only was it a piece-of-mind issue not having to worry about dishes and bottles of red wine and olive oil crashing to the floor, but cleats also fit the old cottage-style I love.

 DIY Corbels for Open Shelving/HomeStagingBloommingtonIL.wordpress.com

 DIY Corbels for Open Shelving/HomeStagingBloommingtonIL.wordpress.com

As always, I’m not suggesting this is the best way or the only way to do this, but it worked well for me. As of this writing, my shelves are still attached to the wall—a rousing success in my mind.

After attaching the cleats to the studs, I screwed the back pieces that sit behind the corbels to the wall, and screwed the corbel into the back piece. After using my Kreg Jig to make pocket holes in the tops of the corbels, I screwed the corbels into the cleats through pocket holes. These steps support the downward weight of the shelves.

 DIY Corbels for Open Shelving/HomeStagingBloommingtonIL.wordpress.com

 DIY Corbels for Open Shelving/HomeStagingBloommingtonIL.wordpress.com

I then made more pocket holes in the pieces that went on top of the corbels and screwed those into the cleats as well. Physics told me that attaching these pieces would prevent the corbels from tipping forward under the weight of objects placed in the area farthest from the wall.

 DIY Corbels for Open Shelving/HomeStagingBloommingtonIL.wordpress.com

 DIY Corbels for Open Shelving/HomeStagingBloommingtonIL.wordpress.com

Next, I added the shelves and screwed them from above into the cleats. The shelves were also curb finds, and the stain color was perfect.

 DIY Corbels for Open Shelving/HomeStagingBloommingtonIL.wordpress.com

I had to purchase some wood trim to cover up the edges of my shelves. As you can see in the next photo, the ends were pretty rough. The side trim I added was wider than the thickness of the shelves which made them look a little more substantial. See the difference?

 DIY Corbels for Open Shelving/HomeStagingBloommingtonIL.wordpress.com

 DIY Corbels for Open Shelving/HomeStagingBloommingtonIL.wordpress.com

I decided to hang the cutting board my son, Brandon, made for me years ago, between the two bottom corbels. I use it all the time, and hanging it here makes it easy to grab and keeps it off the counter. This photo was taken before I painted the walls.

 DIY Corbels for Open Shelving/HomeStagingBloomingtonIL.wordpress.com

Here’s what this corner of the kitchen looked like before. The blind cabinet to the right of the microwave had a door opening that was only 7″ wide. Not only was it hard to retrieve items stored back in the blind area, but its slim opening wouldn’t allow much to fit inside.

The blind cabinet with the 7″ opening was replaced with a 15″ wide cabinet that extends all the way to the ceiling, allowing for a lot more storage space. This left me with a 12″ space in the corner, and I felt open shelving was a lovely (and pretty much the only) option for this awkward space.

 DIY Corbels for Open Shelving/HomeStagingBloommingtonIL.wordpress.com

Here’s what the same corner looks like now. Once I decided on a paint color for my kitchen, I painted the cut-outs of the bottom set of corbels with the wall color.

 DIY Corbels for Open Shelving/HomeStagingBloomingtonIL.wordpress.com

These “after” photos were taken with a new camera that was a gift from my daughter, Sophie. Thank you, Sophie! I love, love, love my babies (even more than my shelves).

DIY Corbels for Open Shelving/HomeStagingBloomingtonIL.wordpress.com

As you can see, the shelves tuck back beside the adjacent cabinet. It’s usable space now, and is accessible where it wasn’t before.

 DIY Corbels for Open Shelving/HomeStagingBloomingtonIL.wordpress.com

DIY Corbels for Open Shelving/HomeStagingBloomingtonIL.wordpress.com

I love these shelves being next to the bright, sunny window.

 DIY Corbels for Open Shelving/HomeStagingBloomingtonIL.wordpress.com

So to recap, this project cost me around $15 for the whole sha-bang. I bought the trim pieces to trim out the ends of the shelving, and a 1 x 12 for the larger corbels. The rest was made with scrap wood I had on hand, or with some trash-turned-treasure wood that I found and rescued. The cabinets I removed were used in my laundry room remodel, so nothing was wasted. Now all of my kitchen space is accessible, and I’m a very happy girl!

This post was written by Tracy Evans who is a Journeyman Painter and Certified Home Stager /Redesigner. If you enjoy gardening, you may want to visit her gardening blog at MyUrbanGardenOasis.

How to Install Hidden Hinges on Cabinet Doors

Drilling for hidden hinges on cabinetry

“It’s all in the details.” We hear it all the time, and how true it is. We all know that one of those details that can give a boost to tired cabinetry is new hardware. But another way to update cabinets is to swap out visible hinges for hidden ones.

Hidden hinges, or European (Euro) hinges as they’re called, aren’t difficult to install, and were part of my mini kitchen update. My kitchen is small, and in order to gain storage space, I switched the 30″ upper cabinets to 42″ ones, but kept some of the existing base cabinets. The very shiny, visible hinges on the base cabinets were a dead giveaway as to which cabinets were the moldy oldies. Here are the originals.

 How to Install Hidden Hinges on Cabinet Doors/HomeStagingBloomingtonIL.wordpress.com

How to Install Hidden Hinges on Cabinet Doors/HomeStagingBloomingtonIL.wordpress.com

I mentioned to my super-smart carpenter brother, Mike, that I was wanting to update my hinges but was afraid of ruining my doors in the process.  I watched a YouTube video of DIYer who tried to install hidden hinges, and I’ll be polite and just say that the outcome was not a good one. Thus my fear. The place I ordered my new cabinets from couldn’t order replacement doors, so this was a one-shot deal.

My brother volunteered to investigate the world of hidden hinges for me since he was going to need to figure them out for a project he was working on too. I pretty much bought him every make and model of hidden hinge I could get my hands on, along with the hinge drill kit.

I gave him one of my old cabinet doors that I wasn’t going to be using, to experiment with. And of course, he figured it out. Here are the hinges from Home Depot I ended up using. There’s a big price savings per hinge if you purchase a 10-pack, by the way.

How to Install Hidden Hinges on Cabinet Doors/HomeStagingBloomingtonIL.wordpress.com

Hidden hinges also come in a soft-close style if you’re one of those people who want the latest and greatest. (Is it really that bad to hear a door close?) My new cabinets came with soft close hinges that I personally could take or leave.  I still find myself trying to shut them all the way instead of letting them do their thing. You might not want soft-close hinges if you’re the type who likes to slam things when irritated. (Just a thought.)

Here’s what comes with the kit to install the hinges–a special drill bit, a template and instructions that I didn’t have to read because my super-smart carpenter brother read them for me. You’ll want to be sure your cabinet door is thicker than this bit or you’ll end up like the YouTube guy.

 How to Install Hidden Hinges on Cabinet Doors/HomeStagingBloomingtonIL.wordpress.com

There are a couple of types of hidden hinges–ones for cabinets with face frames and ones for cabinets without face frames. My cabinets, which are from the late 80’s, have face frames.

There are also a couple of overlay sizes, most commonly  1 1/4″ and 1/2″. Overlay refers to the distance your door overlaps your opening. Mine didn’t measure 1 1/4″ or 1/2″, and this project still worked with my doors. If you’re looking for information on how to measure your overlay, this is not the post for you because I haven’t the faintest idea. Back to Google you go! (Sorry!)

That being said, buying every make and model turned out to be a good idea. I was pretty pumped when I installed my first door…until I shut the door and there was a gap the size of Kansas where the door didn’t cover my opening. I should have taken a picture because it was pretty hilarious-looking. Wrong hinge. So I removed the 1 1/4″ overlay hinge, installed the 1/2″ overlay and was good to go. The holes that need to be drilled in the door will be the same in size, depth and location regardless of your overlay measurement.

So here’s how this works. On the new cabinets I ordered, the center of the hinges were 4 1/2″ from the bottoms and the tops of the doors, so that’s the measurement I used for drilling on my old doors. The original hinges on the old cabinets were placed at about 3″ from the ends, so I didn’t have to worry about the old holes interfering with my new ones.

 How to Install Hidden Hinges on Cabinet Doors/HomeStagingBloomingtonIL.wordpress.com

My brother made me a better, more durable template from some clear plastic he had, so I chose to use his instead. It worked better with the bevel on my door’s edge.

 How to Install Hidden Hinges on Cabinet Doors/HomeStagingBloomingtonIL.wordpress.com

I drilled through the three holes in the template to create the necessary pilot holes, using tape on my drill bit as a guide so I wouldn’t drill all the way through the door.

How to Install Hidden Hinges on Cabinet Doors/HomeStagingBloomingtonIL.wordpress.com

I then lined up the pointed end of the bit with the center hole.

 How to Install Hidden Hinges on Cabinet Doors/HomeStagingBloomingtonIL.wordpress.com

Then I drilled and drilled. If your drill is a wimpy one, be prepared for this to take a minute…or five.  I realized what a difference a decent drill makes during this process as I had three different ones going–one with a bit to drill the pilot holes, one with the hinge bit and one to use as a screw gun for screwing the screws into the cabinet doors. If you have lots of doors to do, it might be a good idea to borrow a second and/or third one from a friend or you’ll spend lots of time playing musical bits. If you have multiple drills, use the most powerful one for the large hinge-drilling bit.

 How to Install Hidden Hinges on Cabinet Doors/HomeStagingBloomingtonIL.wordpress.com

I drilled until the top of the bit was flush with the surface of the cabinet. If you drill too deep, you may end up with a nice peep-hole in your door. That would be a bummer. If it’s not deep enough, the hinge will rock back and forth after you set it in the hole, and you’ll need to drill a little deeper.

 How to Install Hidden Hinges on Cabinet Doors/HomeStagingBloomingtonIL.wordpress.com

And yes, it’s messy!

 How to Install Hidden Hinges on Cabinet Doors/HomeStagingBloomingtonIL.wordpress.com

I thought it would be a great idea to just pick up the door and brush off the shavings into the garbage can. It was a great idea! Except I left one of the screws on the door which ended up in this sawdust abyss–never to be seen again.

How to Install Hidden Hinges on Cabinet Doors/HomeStagingBloomingtonIL.wordpress.com

Here’s the door all cleaned up. Looks like Swiss cheese. These cabinets obviously had more than one set of hinges over the years. I patched all the extra holes since I painted the cabinets white, and once the doors were painted they disappeared completely. If you have stained cabinets, you can fill the old holes with matching wood putty.

 How to Install Hidden Hinges on Cabinet Doors/HomeStagingBloomingtonIL.wordpress.com

The next step was to place the hinge in the hole and hope the pilot holes lined up. And they did.

How to Install Hidden Hinges on Cabinet Doors/HomeStagingBloomingtonIL.wordpress.com

The hinges came with these white tabs, but I chose not to use them. Since my cabinets are oak, I shouldn’t have any problems with the screws working themselves loose, but I’ll save them just in case.

 How to Install Hidden Hinges on Cabinet Doors/HomeStagingBloomingtonIL.wordpress.com

Next I screwed the hinge to the door with the two screws provided, and then I screwed the hinge to the face frame on the cabinet box that I had already painted white. The screw on the right in the set of three on the face frame is used to make adjustments to the door to make it sit level if it’s a little crooked after it’s installed.

 How to Install Hidden Hinges on Cabinet Doors/HomeStagingBloomingtonIL.wordpress.com

So let’s review, shall we? Here’s the original cabinet. Before…

How to Install Hidden Hinges on Cabinet Doors/HomeStagingBloomingtonIL.wordpress.com

Here’s what the cabinets looked like after they were painted, but before the new hinges were added. I temporarily sprayed the old hinges white until my brother got the hinge thing figured out. During…

 How to Install Hidden Hinges on Cabinet Doors/HomeStagingBloomingtonIL.wordpress.com

And here’s after the hidden hinges were added. Much better. Now you can’t tell the old cabinets from the new ones.

How to Install Hidden Hinges on Cabinet Doors/HomeStagingBloomingtonIL.wordpress.com

The doors look a little naked without their hardware that’s been back-ordered for two months now, but then again this post isn’t about cabinet handles and knobs, it’s about hinges.

Once I got over the fear of drilling into my cabinet doors, I realized it wasn’t difficult. You can always try this out on a piece of scrap wood the same thickness of your cabinets first. Or if you’re lucky enough to have a super-smart carpenter brother, maybe he could show you how. 🙂

This post was written by Tracy Evans who is a Journeyman Painter and Certified Home Stager /Redesigner. Feel free to visit her website at www.HelpAtHomeStaging.com to view more before and after pictures of her projects. And if you enjoy gardening, you may want to visit her gardening blog at MyUrbanGardenOasis.

How to Patch Unused Electrical Boxes and Other Holes in Drywall

California patch/drywall repair

If you have non-functioning electrical boxes in your walls that are an eyesore, or a hole in your drywall from a doorknob or perhaps a body part, there’s a patch lovingly referred to as a “California Patch” that works like a charm. I’m not saying this is the best way, the right way or the only way to patch a drywall hole, but I’ve used this method several times, and I won’t patch holes any other way.

I had four electrical boxes within a few feet of each other in my kitchen. Three of these boxes were non-functioning, so they had to go.

Welcome to the outlet convention.

How to Patch Unused Electrical Outlets or Other Holes in Drywall/HomeStagingBloomingtonIL

My home’s previous owner had installed new counter tops, but moved before patching and painting, so I fixed the counter top area at the same time as the boxes. As you can see in the next photo, the messed up counter top area was very close to one of the boxes that had to be patched. So before I began with the outlets, I removed the caulk between the back splash and the wall so I could patch everything at the same time.

 How to Patch Unused Electrical Outlets or Other Holes in Drywall/HomeStagingBloomingtonIL

How to Patch Unused Electrical Outlets or Other Holes in Drywall/HomeStagingBloomingtonIL

I started with the two upper boxes that were previously phone jacks. I removed the plates and the wires that were attached to one of them.

I knew the phone line wasn’t active, so I didn’t have to worry about getting shocked. And yes, you can catch an electrical thrill off of a phone line—sort of like putting your tongue on a 9-volt battery. And who hasn’t done that? The point is, a shock from a phone line won’t injure you, but it’s not exactly a warm fuzzy feeling either.

How to Patch Unused Electrical Outlets or Other Holes in Drywall/HomeStagingBloomingtonIL

How to Patch Unused Electrical Outlets or Other Holes in Drywall/HomeStagingBloomingtonIL

I discovered these two outlets were connected. The original phone jack was the one on the right, and the wiring was fished into the box on the left.

How to Patch Unused Electrical Outlets or Other Holes in Drywall/HomeStagingBloomingtonIL

So I cut the wire, and pulled it out.

 How to Patch Unused Electrical Outlets or Other Holes in Drywall/HomeStagingBloomingtonIL

How to Patch Unused Electrical Outlets or Other Holes in Drywall/HomeStagingBloomingtonIL

I did a little happy dance when I noticed the blue tabs were on top of the drywall on this box.  That told me that it was added after the house was built, and would be easy to remove.

 How to Patch Unused Electrical Outlets or Other Holes in Drywall/HomeStagingBloomingtonIL

I removed the screws and pried the box out of the drywall.

 How to Patch Unused Electrical Outlets or Other Holes in Drywall/HomeStagingBloomingtonIL

 How to Patch Unused Electrical Outlets or Other Holes in Drywall/HomeStagingBloomingtonIL

Removing a box before patching is ideal, but as you’ll see when I get to the second box, you can still patch a hole with the box still inside if there’s no way to remove it.

The next steps are to clean off any rough spots on the edges of the box, to clean up the corners with a knife so that they’re nice and square and to remove any lumps and bumps on the surface of the drywall around the hole.

I cut a piece of drywall two inches bigger than my opening, so I’d have at least one inch extra on each side of the opening.

 How to Patch Unused Electrical Outlets or Other Holes in Drywall/HomeStagingBloomingtonIL

Then I measured the size of the hole and transferred the measurement onto the front side of the piece of drywall.

 How to Patch Unused Electrical Outlets or Other Holes in Drywall/HomeStagingBloomingtonIL

I scored each line using a straight edge. I tried to score just inside my lines to be sure the patch would be just a tad smaller than the actual hole.

 How to Patch Unused Electrical Outlets or Other Holes in Drywall/HomeStagingBloomingtonIL

I wasn’t strong enough to snap the drywall, so I went along each scored line, and pushed my knife into the drywall in several places to help the drywall snap more easily.

 How to Patch Unused Electrical Outlets or Other Holes in Drywall/HomeStagingBloomingtonIL

After making the deeper cuts,  I was able to snap along my scored edges, being very careful not to tear through the paper on the back of the drywall.

 How to Patch Unused Electrical Outlets or Other Holes in Drywall/HomeStagingBloomingtonIL

I peeled off all of my edge pieces, leaving the center rectangle stuck to the drywall paper. This is my patch.

 How to Patch Unused Electrical Outlets or Other Holes in Drywall/HomeStagingBloomingtonIL

 How to Patch Unused Electrical Outlets or Other Holes in Drywall/HomeStagingBloomingtonIL

Important tip #1: It’s important to score deeply into the drywall because if you have to use a lot of force to pop the edge pieces off, you may tear off the back paper, and the paper has to stay intact in order to repair the hole.

Next, I tested the patch to be sure it would fit into my hole in the wall. Magnificent!

How to Patch Unused Electrical Outlets or Other Holes in Drywall/HomeStagingBloomingtonIL

If a patch doesn’t go into a hole easily, I don’t force it because I’ll need to be able to take it back out in order to mud. If it doesn’t go in, I shave off some areas around the opening in the wall until the patch goes in snugly, but I don’t want it so tight that the paper tears off the back when I try to remove it.

I know it looks sort of like a square butterfly, but bear with me.

 How to Patch Unused Electrical Outlets or Other Holes in Drywall/HomeStagingBloomingtonIL

Since this first patch was on my back splash, I wanted to reinforce it in case I decided to put up tile at some point. I didn’t want to pop this patch back out when pressing on the tile. I also would do this next step if I were patching in an area that might take some extra abuse like a child’s room or a main hallway.  I chose not to do this next step on my other two patches because of their safe locations.

I took a piece of scrap wood—in this case a stir stick—and I put it up inside of the hole and screwed it in place.

 How to Patch Unused Electrical Outlets or Other Holes in Drywall/HomeStagingBloomingtonIL

 How to Patch Unused Electrical Outlets or Other Holes in Drywall/HomeStagingBloomingtonIL

I made sure to countersink my screws a little bit.

 How to Patch Unused Electrical Outlets or Other Holes in Drywall/HomeStagingBloomingtonIL

Then I drove two dry wall screws into the front of the patch to secure it to the wood.

And with that, patch number one is ready to mud, but I need to get my other two patches ready first.

The second patch had to be repaired with the outlet box still inside because it wouldn’t budge. It was clearly installed when the house was built, and was secured to a stud. The obstacles on this patch were going to be the two spots inside the box where the screws held the cover on. These screw spots were going to be in the way of my patch, but I had a plan…

 How to Patch Unused Electrical Outlets or Other Holes in Drywall/HomeStagingBloomingtonIL

But before my master plan, as with the first box, I scraped off any lumps and bumps, including the area around the screw hole above the box that had drywall paper edges coated with paint sticking out of it. (Notice in the last photo. Looks like I turned an outie into an innie.)

 How to Patch Unused Electrical Outlets or Other Holes in Drywall/HomeStagingBloomingtonIL

So now, for the plan. In order to get this next patch to fit around the screw mounts inside the box, I used a drill bit the same size as those pesky screw holders, and drilled a hole in the corresponding spots on my patch. Here I measured for the correct size bit. This one was the winner!

 How to Patch Unused Electrical Outlets or Other Holes in Drywall/HomeStagingBloomingtonIL

I put blue tape on my bit as a guide so I wouldn’t drill too deep. I didn’t want to drill completely through my patch. If I did, I’d have to patch my patch!

 How to Patch Unused Electrical Outlets or Other Holes in Drywall/HomeStagingBloomingtonIL

Here’s one of my two partial holes.

 How to Patch Unused Electrical Outlets or Other Holes in Drywall/HomeStagingBloomingtonIL

Then I cut this patch the same way as the first one.

How to Patch Unused Electrical Outlets or Other Holes in Drywall/HomeStagingBloomingtonIL

It worked like a charm! If you don’t have a drill, I’m sure cutting away some of the drywall with a sharp knife would also work. I had a drill handy, and I decided to go that route so I wouldn’t have to worry about poking a knife through the front of the patch.

 How to Patch Unused Electrical Outlets or Other Holes in Drywall/HomeStagingBloomingtonIL

Now with patch number two ready, it’s on to patch number three. The box closest to the floor housed a TV cable. I had cut off all 2000 of the Direct TV cables off of the outside my house months ago. Cheers to whoever invented wireless technology! The side of my house looked like a black licorice factory before I removed all the tv cables.

 How to Patch Unused Electrical Outlets or Other Holes in Drywall/HomeStagingBloomingtonIL

This one was different from the other two, as it had this funky metal face plate that was mounted to the face of the stud behind the drywall. I felt around inside the box and realized that if I moved the plate around and beat it with a hammer at just the right angle, I could remove it.

 How to Patch Unused Electrical Outlets or Other Holes in Drywall/HomeStagingBloomingtonIL

I want to stress one last time how important it is to remove all the junk around the wall opening, especially on the face of the wall. This hole was particularly bad. If you have any bumps under your patch, it’s not going to work! See how much smoother after a cleaning?

 How to Patch Unused Electrical Outlets or Other Holes in Drywall/HomeStagingBloomingtonIL

 How to Patch Unused Electrical Outlets or Other Holes in Drywall/HomeStagingBloomingtonIL

Finally all my patches were test fitted.

 How to Patch Unused Electrical Outlets or Other Holes in Drywall/HomeStagingBloomingtonIL

Then I finally broke out the mud! This process was the same on all of three of the patches.

I chose to use Durabond because it’s stronger than regular joint compound, dries much faster, and I always have it on hand. It’s a powder that mixes with water to form mud. I used 20 minute Durabond. (Meaning you’re supposed to have 20 minutes of working time, but it doesn’t usually last that long.)

How to Patch Unused Electrical Outlets or Other Holes in Drywall/HomeStagingBloomingtonIL

I removed my patches after their test fits, and then I spread Durabond around the hole to use as “glue” for the paper flaps on my patches to stick to.

 How to Patch Unused Electrical Outlets or Other Holes in Drywall/HomeStagingBloomingtonIL

I inserted my patch.

 How to Patch Unused Electrical Outlets or Other Holes in Drywall/HomeStagingBloomingtonIL

After pressing the paper down into the mud with my fingers, I took my broad knife, and pressed firmly enough to squish as much mud as possible out from behind the patch, so it was as flat as possible. I was careful not to tear the paper.

 How to Patch Unused Electrical Outlets or Other Holes in Drywall/HomeStagingBloomingtonIL

After I removed as much mud as possible, I spread a coat of mud over the entire surface of the patch, and yes, it was ugly. It’s always ugly. Expect it. You may end up with tiny pin holes at this point too, but don’t worry about those at this stage. I spread the least amount of mud on as possible. If I applied too much mud, I’d either have an awful lot of sanding to do or I’d have a massive hump on the wall, neither of which excites me.

 How to Patch Unused Electrical Outlets or Other Holes in Drywall/HomeStagingBloomingtonIL

I told you this was ugly. I could go over this and over this and try to make it look pretty all day long, but at this stage, it’s just not gonna happen. It’s also normal to be able to see the outline of the patch after the first coat.

 How to Patch Unused Electrical Outlets or Other Holes in Drywall/HomeStagingBloomingtonIL

After it dried, I sanded with a sanding sponge until I just barely started to see my patch underneath. You can see here in the lower center of the next picture that I actually sanded into the drywall paper, which you really should try to avoid.

However, I’m not a professional drywall finisher, so it works best for me to sand until I just barely start to hit the paper on the first sand only. That way I can see where I’m at, and I know I don’t have a lot of excess mud before applying the second coat.

Let me be clear on this one. As soon as I see the smallest spot of paper, I stop sanding. I’m not suggesting that you sand off all your mud so all the paper on your patch is exposed. For me it’s best to get close because less mud on the patch means less floating later trying to level out the raised area I just created.

 How to Patch Unused Electrical Outlets or Other Holes in Drywall/HomeStagingBloomingtonIL

 How to Patch Unused Electrical Outlets or Other Holes in Drywall/HomeStagingBloomingtonIL

I applied subsequent coats of mud in order to get rid of the raised area I created with the thickness of my drywall paper from my patch (aka the butterfly wings), as well as the mud I applied. In order to do that, I had to make the patch bigger and float the mud out farther until the raised part very gradually tapered off into the finished wall. Since two of the patches were close together, it made sense to join them into one, level patch. I re-coated two more times, sanding in between coats, until the raised areas seemed to disappear.

 How to Patch Unused Electrical Outlets or Other Holes in Drywall/HomeStagingBloomingtonIL

 How to Patch Unused Electrical Outlets or Other Holes in Drywall/HomeStagingBloomingtonIL

This is messy and takes a little bit of patience.

How to Patch Unused Electrical Outlets or Other Holes in Drywall/HomeStagingBloomingtonIL

Important tip #2: If you feel like your patch is finished, rub your hand over the whole area starting on the finished wall, then over your patch and then onto the finished wall on the other side of your patch. If you feel waves or humps on your wall that you can’t seem to get rid of, either keep sanding until the humps go away or float more mud out on the edges of your patch to level it out. If you can feel the wall isn’t right, those issues will be magnified once you’ve painted your wall. And once you’ve painted over the humps, you can’t sand them any more!

One more time. A patch might appear to be visually ok on the stark white mud that has no sheen to it. But if you can feel humps on your wall, once you paint, the sheen from your paint will highlight them and they’ll show. And they may not be too noticeable with primer either, but once painted, they will rear their ugly heads. Trust me on that one.

The most difficult part of a California Patch is getting rid of the raised area. The secret is floating the patch way out so that the patch blends slowly and gradually into the existing wall.

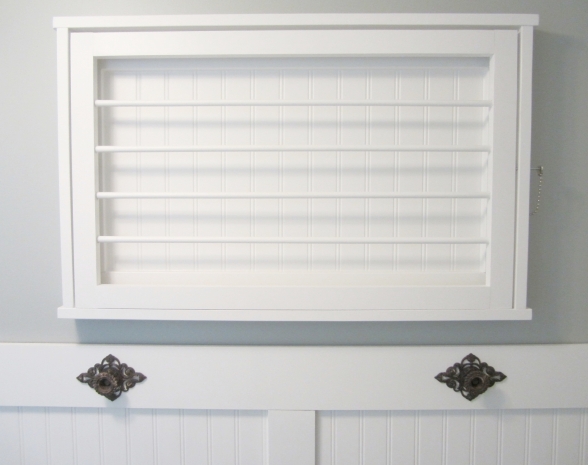
Here’s my (almost) outlet-free wall! Much better!

 How to Patch Unused Electrical Outlets or Other Holes in Drywall/HomeStagingBloomingtonIL

And of course, I have to do at least one before and after photo! Keep in mind I still have to caulk and paint. This is part of a mini kitchen remodel, and I won’t be painting for a while yet. I’ll try to add a more finished-looking “after” photo once the kitchen is painted.

 How to Patch Unused Electrical Outlets or Other Holes in Drywall/HomeStagingBloomingtonIL

 How to Patch Unused Electrical Outlets or Other Holes in Drywall/HomeStagingBloomingtonIL

California patches are best used on “smallish” holes—up to about 6 inches or so. I’ve repaired dryer vent holes, holes from old intercom speakers and holes from door knobs this way. It’s a nice way to go because in most cases, it doesn’t require paper tape, mesh or any materials other than a scrap of drywall and mud.

This post was written by Tracy Evans who is a Journeyman Painter and Certified Home Stager /Redesigner. Feel free to visit her website at www.HelpAtHomeStaging.com to view more before and after pictures of her projects. And if you enjoy gardening, you may want to visit her gardening blog at MyUrbanGardenOasis.