
As part of my laundry room makeover, I needed to find a creative, functional way to fill an empty space next to my dryer. It was a smallish, awkward space that was too narrow for a pantry-type cabinet, so I decided a small table that I could use when I fold laundry would be the next best thing.
My laundry room is a bit odd because instead of having the washer and dryer side by side like the rest of the civilized world, mine are directly across from each other. So that awkward space that most people have between their washer and dryer, for me, happens to be between my dryer and the wall. Here’s the “dryer side” of my laundry room right before I moved in.

I realized there was a zero chance that I would find a table exactly the size I needed—16″ wide, 31″ deep and 39.5″ tall. Those were peculiar dimensions for a table, but I had a vision. And I knew the only way to get that table out of my head and into my laundry room was to build it myself. Thus my twenty-seven cent table was born.
My goal was to build a table that would fit snugly enough between the dryer and the wall that socks and undies couldn’t go AWOL. I wanted the table to be on wheels so I could slide it out easily if need be, but most of all, I just wanted the darn thing to be cute. Function doesn’t have to be ordinary.
Here are some of the materials I used to make the table. As always, I would like to point out that it pays to pull treasures off of curbs.

Bargain number one…I pulled the bed posts off of a curb a few years ago. They had decorative tape all over them. Some little girl was expressing herself I suppose. I got tired of peeling it off, so you can still see some of the stubborn pieces in the photos.
Bargain number two…the wheels. These were off of a butcher block kitchen cart I found next to a dumpster. I took it home and stripped it down like a car thief strips down cars for parts. You might scoff at that, but I got some pretty handsome wheels to show for it.
The plywood scrap, as well as some 2 x 4’s and other trim that you’ll see in future photos was all leftover from other projects.
Note that a bolt was missing from one of the ends of the bed posts in the last photo. I bought a new bolt and cut off the head with a hack saw to replace the missing one. There’s where my twenty-seven cents came in. It’s the only item I had to buy specifically to build this table. (I bought four bolts, but only ended up using one.)
I was going to begin this project by cutting the knobs off the ends of the bedposts so I would have a flat surface to attach the wheels to. As luck would have it, the knobs actually screwed right off! And the threads on my wheel brackets matched the threads on the metal pieces inside the bed posts so they screwed right in. It doesn’t get much simpler than that!
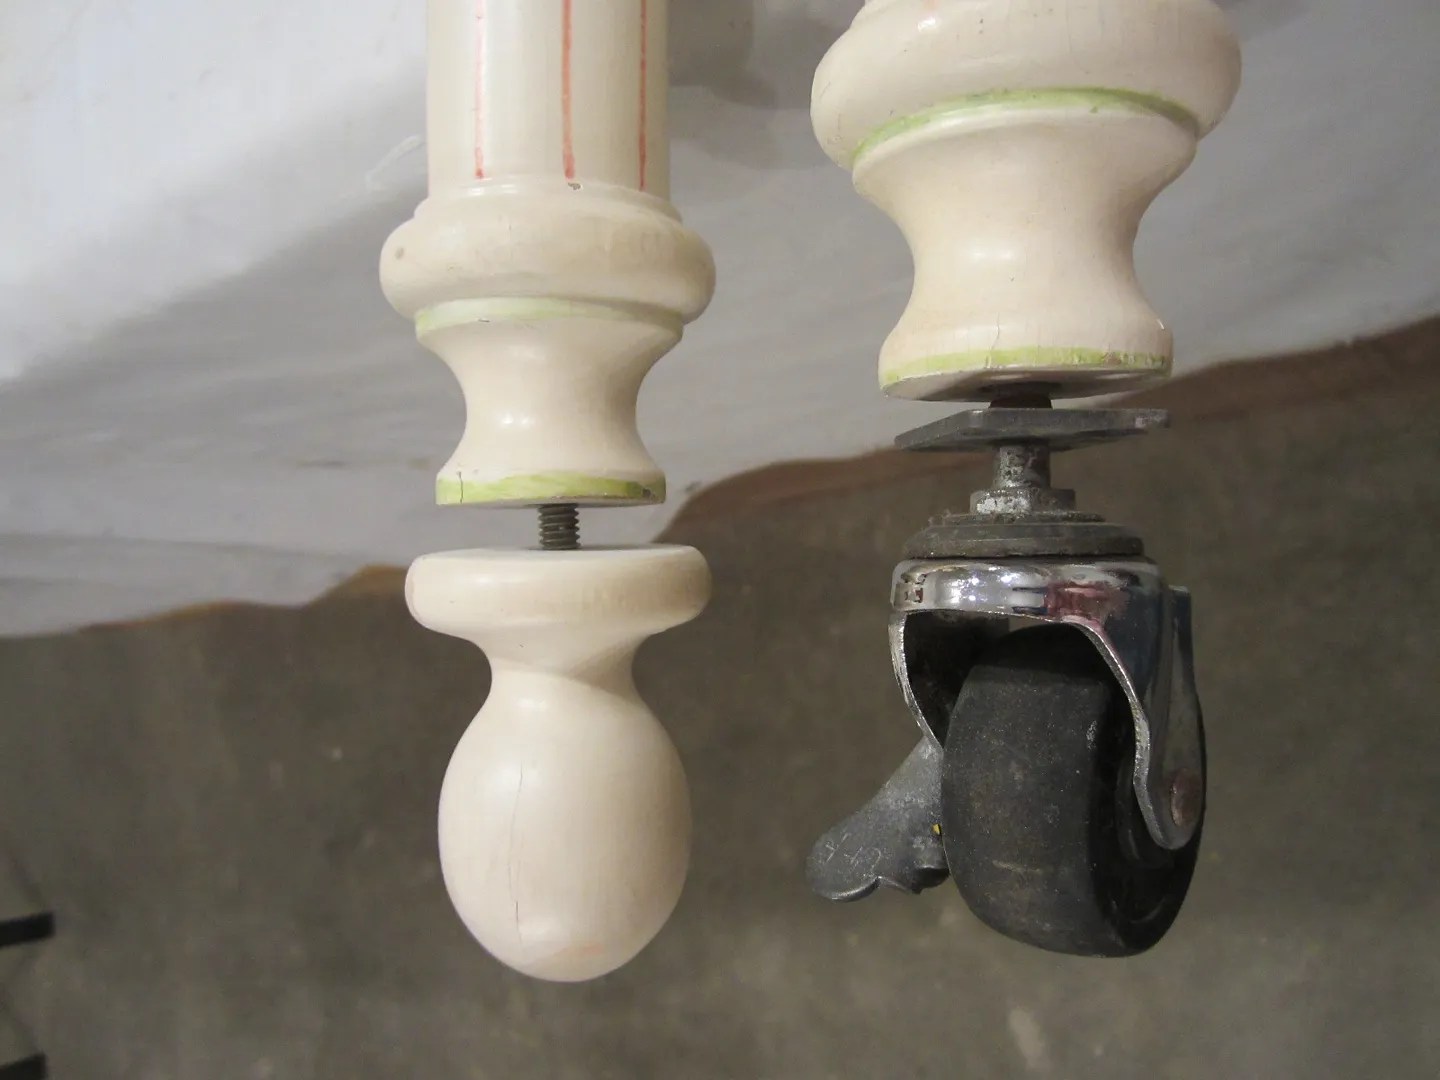
Now I have four little knobs for another project!

In order to make the table the correct height, and to have something to attach the bed posts/legs to, I added 2 x 4 blocks to the underside of the plywood. I measured where they needed to go and drew lines as a guide as to where to install them.

I’ve had these spiky threaded do-dads in my stash for so long that I don’t remember where I got them. I had no idea what they were used for, or what they were even called, until I looked online for ideas on how to attach legs to tables. They’re called t-nuts, and the threads inside the t-nuts were a perfect match with the threads that were inside the other ends of the bed posts.

After drilling holes into the wood blocks for the t-nuts, and pounding the them in, I screwed each block into the plywood top.


Next I screwed the legs into the t-nuts.


Unfortunately the legs were a tad wobbly, so I added extra screws to them.

I flipped the table over and added some ripped down ship lap that was leftover from my screened porch. It covered all the ugliness going on underneath the table. (Note the nice shot of the blue zebra tape.)


At this point, I primed the plywood top and the legs, but only after some deep breathing and determination to finally get rid of that last bit of tape!

To add a little more detail, I layered some door casing I had leftover from when I trimmed out my doors and windows on top of the ship lap.

Next, I added trim that was leftover from my kitchen remodel to cover the rough plywood edges.

I primed the trim and painted everything with two coats of paint, and my table was complete! Here she is.

Now I no longer have an awkward space next to my dryer. I’ve got a place for some pretty flowers to add a little cheer to my laundry room, and I’ve got a spot for clean laundry when I’m folding.

One of these days, I’ll be posting my complete laundry room redo, so without giving away too much, here are my before and after photos.

Final thought…I realize you may be thinking, “Does she really think I’m gonna walk down the street and just happen to stumble across four bed posts that I can make a table with?” The answer is probably not (although it did happened to me *grin*). But you could pull legs off of a table purchased at your local Habitat Restore, thrift store, yard sale or yes, even from a free heap on the curb, to make a custom table to fit your space.
Be creative. Use your imagination. There are endless ideas on Pinterest and Google on how to create simple projects like this one to personalize your space and make it function for you. So get going!
This post was written by Tracy Evans who is a Journeyman Painter and Certified Home Stager/Redesigner. If you enjoy gardening, you may want to visit her gardening blog at MyUrbanGardenOasis.


I love the way you used different materials to make the table look so nice.
LikeLike
Thank you!
LikeLike
Love it! So envious of your talent, sis!
LikeLike
Aww shucks. Thanks!
LikeLike
[…] To satisfy my need for a place to sort laundry, I built this table the same height as my dryer. With the dryer and the table combined, I now have a small area to stack clean clothes. I built the table with legs made from old bedposts I found on a curb. Sometimes my curb shopping and hoarding come in handy! See details on construction here. […]
LikeLike