I would like to dedicate this post to my mother, who passed away April 17th, 2016. This one’s for you, Mom. ♥
Once upon a time, I created a super-organized pantry. Then I moved. (Sigh.) But new beginnings bring new opportunities, so here’s my new and improved pantry. After much searching for different ways to organize spices and such, I tweaked some Pinterest ideas, and here’s what I ended up with.

Let me first say that I had some reservations about this project, not because of the building of the racks, but because of the uncertainty of mounting them on a hollow-core door. If you have the same hesitation, don’t sweat it because mounting the units was easy, and they feel very safe and secure.
This project requires only basic carpentry skills. And if you’re reading this tutorial, you will also benefit from my mistakes, as I’ll also be sharing with you what not to do. You’re welcome.
My projects are usually pretty inexpensive because I use leftovers from previous projects, treasures from garage sales, and special finds from curb shopping. (I pull a ridiculous amount of wood off of curbs.) That being said, this project is no exception and cost me less than $25. A wire-coated rack would cost two to three times that much, and wouldn’t be specific to your needs like one you can make yourself.
First, I gathered up all of my spices and other items that I wanted to store in the racks, so I would know how to space the shelves and how much wood I was going to need.

I found it helpful to draw a simple sketch, although I did change some of the shelf spacing as I got further into this project. (Incidentally, the second set of numbers on my rough sketch don’t add up to the total shelf dimensions, as they were measurements of the spaces not including the wood. My math isn’t that bad.)

Since I was doing this project without help, and because of my irrational fear of mounting something on a hollow core door, I decided to break this down into two more manageable units rather than one big one. That turned out to be a very good thing.
Since spices are small and lightweight, I used thin pieces of wood to build the top section. I used Pine Mull Casing scraps that I had leftover from another project.
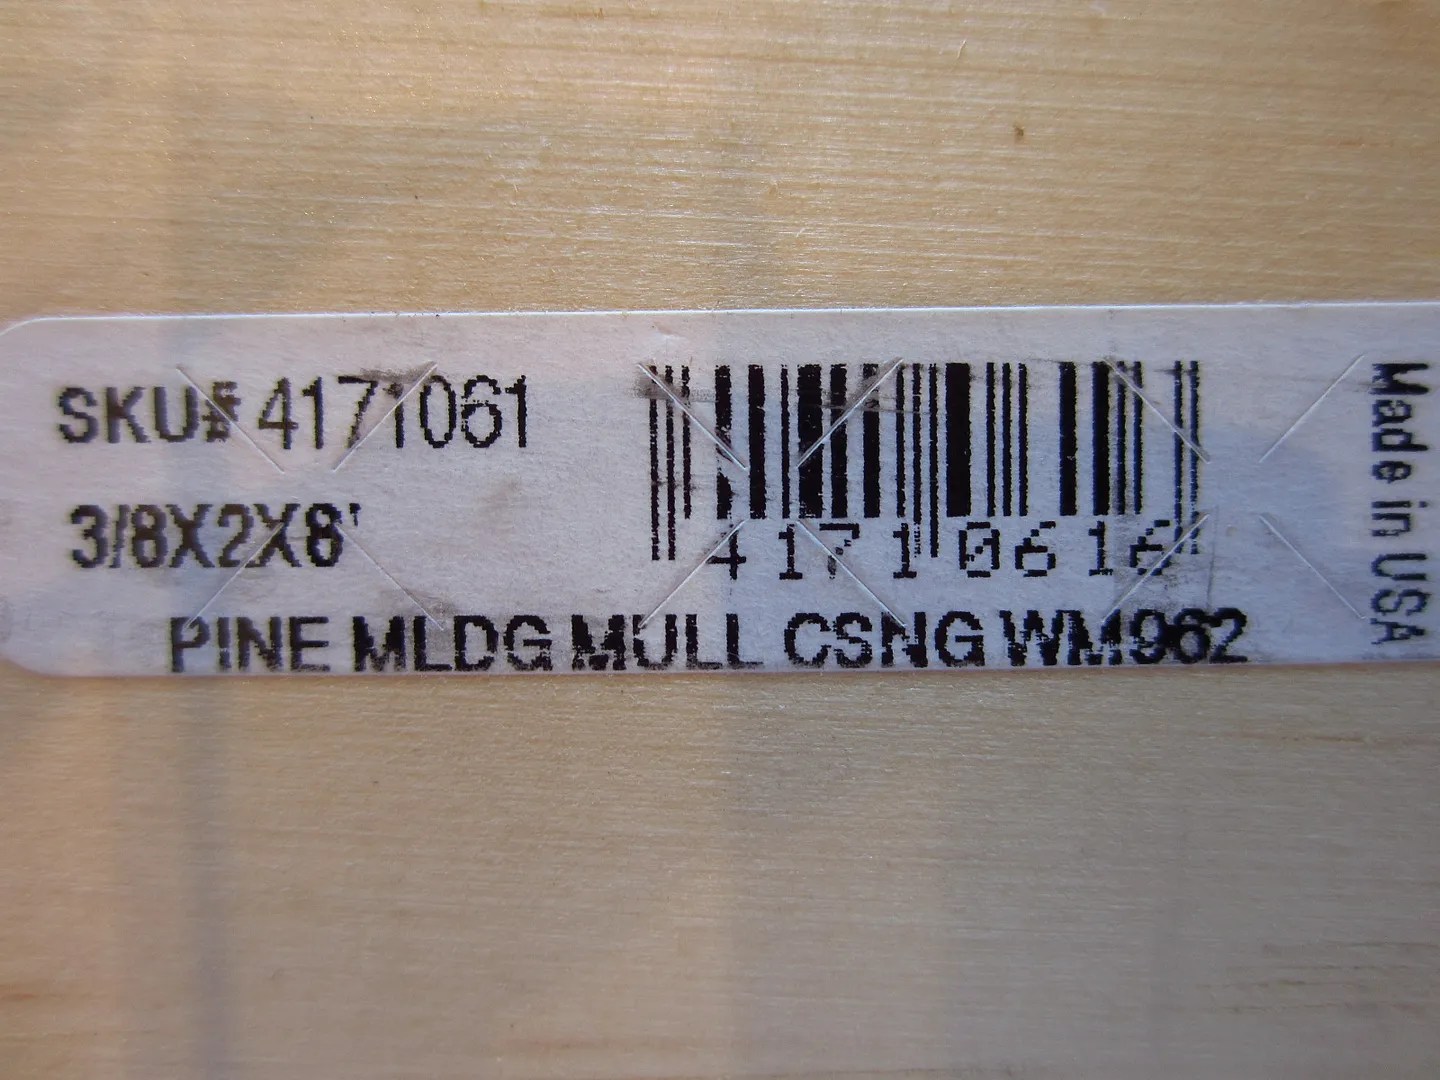
I have no clue what mull casing’s intended purpose is, but I’m pretty sure it wasn’t created for DIY spice racks. It resembles lattice, but is thicker. I strongly suggest not attempting to use lattice for this project because nails need to be driven into the skinny side of the wood, and lattice is too thin. The mull casing measured 3/8″ thick, and just shy of 2″ wide—just like it said on the sticker in the last photo. Imagine that.


Most of the spice racks I saw on Pinterest used wooden dowels to hold the spices in place, which is nice because a small dowel won’t cover up too much of a spice container’s label. However, I chose not to use dowels for four reasons. I would have had to use a wider, bulkier piece of wood to construct the frame if I went with dowels, since a dowel eats up shelf depth; because they are a son-of-a-gun to paint; because I didn’t want the stress of trying to drill the mounting holes perfectly even on the side boards and because I had something else on hand that I could use for free.
And my free dowel substitute was…(da, da-da, daaaaa), wood from a clothes-drying rack. Yes siree, ladies and gentlemen. Recycling at its finest. I disassembled the pieces, and spackled over the center holes to make them disappear. The end holes were cut off when I cut the pieces down to fit the units. I know what you’re thinking. But for the record, I’ve used these before on a similar project, and once they’re painted up, they look great. I also liked these because the edges were routed. If you don’t happen to have a broken clothes drying rack lying around, screen molding or another small piece of trim would be another option.
 I used the recycled wood pieces for the bars that hold in the taller spices, and to make a ledge to hold my smaller spices on the shelves without covering their labels.

I bought bead board paneling for the back of the shelves. Not only did it keep the shelving unit square and more secure, but it was what I screwed into to attach it to the door. Plus it looks sweet! Home Depot sells 32″ x 48″ sheets of bead board for $10, and they cut it to size for me. I laid everything out to get an idea of spacing.

The bead board on my top unit was 18″ wide x 32″ tall, and the bead board for the bottom unit was 18″ wide by 30″ tall. My pantry door measured about 24″ x 7′, which left roughly three inches of space on each side to allow the door to open and shut freely. Very important.
I suggest priming and painting the wood pieces before you cut them. You can paint it in half the time with a lot less mess. I didn’t paint first because I was on a roll and didn’t want to stop, but this is one of those important do-as-I-say-not-as-I-do suggestions.
I cut all my pieces making sure that all of the shelves were exactly the same length, and making sure that the two side pieces were exactly the same length. If the boards are not of equal length, you will not be a happy camper when you assemble them.
For the small spice containers, the space between shelves (not including the shelf itself–air space only) was about 3 3/4″, and for the taller spice containers, the space was 6″. That spacing allowed just enough “headroom” to be able to lift the taller containers up and over the bar that kept them from falling out.
Next I pre-drilled all my nail holes. Simply put, I stink with a hammer. And since there wasn’t much room for error on this thin wood, I needed the nails to go in very straight. Also, the nails were tiny and would bend easily if I didn’t have pre-drilled holes. Bending nails while hammering them is my specialty.

I pre-drilled two holes per shelf on the pieces of wood that formed the sides of the unit, and partially inserted my nails. I knew that assembling this was going to be a balancing act, and I didn’t want to be scrounging for nails while trying to hold the boards, with a hammer clenched between my teeth.


I glued the end of every board I nailed. And yes, I did get this unopened glue for $1 at a garage sale (note sticker). If you are buying wood glue for this project, make sure to get paintable glue.

Then I nailed and nailed…
A smaller upholstery hammer worked best for the small nails.


Then I laid my rack on the bead board to make sure it was square.

I loosely tacked the bead board to the shelf to keep it square while the glue dried, although that probably wasn’t necessary since it was pretty square on its own. ( Can you say OCD?) I tacked it loosely so that after the glue set up, I could remove the bead board, and paint it more easily.


Next, I repeated the same process for the bottom unit, only I used 1 x 4 pine instead of mull casing in order to accommodate larger items.

Next I primed, and then painted using a latex semi-gloss paint from Sherwin Williams in the color “Pure White”. You must prime raw wood before painting it if you want your paint to adhere.
The bead board was already white when I bought it, but I painted it so that when I had paint touch-ups after I mounted it (fingerprints, glue, hammer marks), the whites all matched. And you will have paint touch ups, trust me. I made sure I painted the edges of my bead board since they’ll be visible.


After the paint dried, I assembled all the wood pieces. I used nails and glue to attach the bead board backing. I also drove a nail through the back of the bead board and into the center of each shelf to prevent the shelves from sagging or warping over time.

Then came the scary installation part. This was especially nerve-racking for me because I had just installed new interior doors. And if that weren’t enough, they were special ordered from Lowe’s, so if I messed up the door, it was going to be awhile before I could get a new door to try again. Pressure. Here are the hollow-door anchors I used. A package of four was under $2 at Home Depot.

Basically, how these work is you hold your item to be hung, up on the door. You drill through your item and into the door where you want your screws to be. Remove the item, install the anchor into the hole you drilled in the door and then put the item back up and screw it on. Boom. Done. But not so fast.
I drilled holes for the mounting screws through the bead board backing where I felt the screws would be hidden behind the spices. I did this without holding the shelf up to the door since I knew it would be difficult for me to hold up the shelf and drill at the same time. Not a great idea.

Unfortunately, I didn’t take into account where the recessed panels on the door were. So when I held the drilled shelf up to the door, re-drilled through the existing holes in the bead board and into the door, the holes ended up in a recessed panel. I will admit a swear word left my lips on that one. So I ended up drilling two more holes in my bead board and my brand new door. (Personal thank you to whoever invented spackle.) Here’s a picture of where you don’t want your holes to end up.

I decided to use three anchors for each shelf unit, but four–one in each corner–would have been better.
Since my door had a handle rather than a knob, I had to be sure to place the bottom unit low enough so that it didn’t interfere with the handle’s operation.

I was still leery of this whole hollow door issue, so I decided it best to install the lower shelf first. A screw-up down low wouldn’t be as noticeable.
I stacked pieces of wood on the floor under the shelf, so I wouldn’t have to try to hold it while I was drilling. I made sure it was at the desired height, centered and level on the door. Next I drilled through my existing holes in my bead board (the second set–ugh) and into the door.

I removed the shelf from the wood stack, and screwed the wall anchors into the holes I had drilled in the door. The creaking noises during the screw turning made me cringe a bit, but I kept plugging away—ever so gently.


Since hollow core doors these days are sort of cardboardish, I was left with fuzzies around the anchors. My OCD was wanting to give that thing a hair cut, and I openly admit I started to remove it with a utility knife. But I got a grip and quit because that tiny bit of “squish-out” is never going to be seen—ever.
I propped the shelf back up on the piece of wood, lined up the holes in the bead board with the wall anchors (I could actually see the anchors through my drilled holes if I looked closely) and installed the screws.
I repeated the process with the top shelf. Installing the bottom unit first, turned out to be a good idea because I could balance the top unit on it while I leveled and drilled.

Lastly, I painted the screws and touched up the paint as needed.
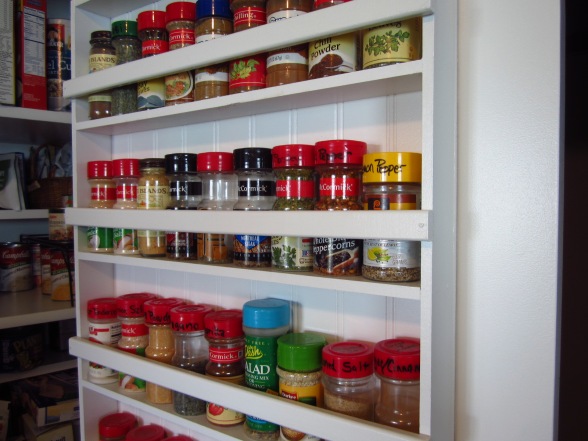
I had actually stopped using most of my spices after I’d moved because it was such a hassle to find what I needed. You can see why from this “before” photo.

And here are my after photos.


It took me about a day and a half from start to finish for this project. That included figuring out how to space everything, a trip to Home Depot for supplies, painting, assembling and hanging. It was well worth the time, as these storage units have made my life so much easier, and now I have two empty cupboards in my kitchen!

If this project seems too complicated for you, and your spice cupboard is a wreck, you may want to check out my simpler “no construction” Dollar Store idea for storing spices by “Clicking Here“.
This post was written by Tracy Evans who is a Certified Home Stager, Certified Redesigner and Journeyman Painter. Feel free to visit her website at www.HelpAtHomeStaging.com to view more before and after pictures of her projects. And if you enjoy gardening, you may want to visit her gardening blog at MyUrbanGardenOasis.


I’m still VERY impressed, so awesome! And Sis, Mom (and Dad) would be so proud! Great job. Wish my spices were like that instead of on lazy susan’s in my cupboard where stuff falls off.
LikeLike
Thank you! Maybe you could hit the Dollar Store for some butter dishes!!!
LikeLike
Great overview! This type of unit is so easy to build and what a wonderful space saver. If looking to purchase ready made it would be very costly. Thanks for this wonderful tutorial.
LikeLike
Thank you, Diana. I agree, to buy something like this would be pricey. The best part is it can be made to accommodate everyone’s personal sizes of pantry items. Thank you for the lovely compliment!
LikeLike
Great project. I am working on duplicating it now. I do have one question. How high up are each of the strips across the front of the spices (small spices, taller spices and larger bottom shelves)?
LikeLike
I’m happy that you’re making one of these for yourself! You’re gonna love it. The actual “air space” in the top three shelves with the large spices (not including the wood) is right at 6″, and from the top of the strips to the top of the boards that the spices are sitting on measures 2″ on the top three sections. The bottoms of the strips on the next three shelves sit flush with the bottom of the wood that the small spices are sitting on. My strips are 3/4″ tall, and they basically just form a barrier that holds the small spices on. On the small spices, the strips stick up 1/2″ in front of the spices. It works out well because I can see all the labels on the small ones. On the bottom section, the openings are all different to accommodate the different sized boxes. The height of the strips on those vary a little bit, but from the top of the wood shelves that the items sit on, to the top of the strips are roughly 3″. I would strongly advise laying everything out based on your items. I built my main boxes, laid them on a table, laid out the shelves and the strips and “practiced” inserting and removing items from the shelves. I wanted to use every inch and placed my shelves as close as I possibly could, while still being able to remove the spices and boxes. If you put the shelves too close together or put the strips too high, you won’t be able to put the spices in or remove them! The space on my top shelf, for whatever reason, ended up 1/4″ shorter than the other two (5 3/4″ instead of 6″). Another 1/8″ smaller and I wouldn’t have been able to use that shelf. If you’re close on your measurements, it might be a good idea to just lightly tack your strips in and try them out before you commit. Good luck!
LikeLike
This is fantastic. We’re building a new house this year and this is exactly what I want for the inside of my pantry door. I’m saving these directions and am looking forward to making it!
LikeLike
Please let me know how your spice rack turns out!! It’s so nice to be able to see all the spices at once so you don’t end up buying duplicates because you can’t find what you’re looking for. It also freed up a complete cabinet in my kitchen. Good luck and thank you for your comment!
LikeLike
Hi Tracy – I just discovered your blog and I love it! And this may sound silly, but I love that you’re a woman who does all this stuff. You’re inspiring me to get over my fear of tackling woodworking projects (or anything that involves a trip to Home Depot). I just never learned this skill set, and have been embarrassed about it for too long…but as a woman, I worry about asking for guidance and admitting that I know nothing. I poked around on your site…do you have anything for beginners? Tips, tricks, starter projects? Suggested first tools? I am really starting at the beginning…I can hammer in a nail but that’s about it. I would love to get your thoughts on how to get started on this whole new world of crafting and building!
LikeLike
I’m so excited that you’re going to give DIY a try!! I’ve thought about doing some really basic posts before, but then I end up nixing the idea. I’m sure there are other people out there like you who don’t know where to begin, so I’ll consider that in the future. I can tell you in all honesty, if you can hammer a nail, you’ve got a good beginning because I can’t hammer a nail to save my soul. I don’t know what your budget allows, but my biggest tip for getting some basic tools if you’re on a budget is to hit some garage sales and estate sales. The bulk of my tools are second-hand, and I also pick up all kinds of nails, screws, hinges, wheels, brackets, clamps, chisels, levels, and such at garage sales too. I pull huge amounts of different types of wood off of curbs for many of my projects. My number one tool suggestion would most definitely be a good quality drill to use for drilling and to use as a screw gun to put in screws. A miter box/saw will go a long way until you can get a variety of power saws. Miter boxes are inexpensive and actually make nicer cuts than power saws in my opinion, but you’ll be limited on the size of board you can cut with it. A jig saw and a power miter saw (chop saw as some people call them) would be next on the list. (I would read up on safety before using a power miter saw.) You could actually make the spice rack I posted about with a hammer, nails, and a miter box if you have the bead board cut at the store. You’ll be amazed at what you can do! Hope this helps.
LikeLike
[…] DIY Pantry Spice Rack […]
LikeLike
i am going to do it . you where very good . thank you .i think my wife will love it
LikeLike
Thank you, Jimmy! I’m sure she will! It’s quite a space saver and it’s nice to be able to see what’s in your cupboard.
LikeLike
Love it. I always thought our pantry was bad. It’s good to know we have Kin out there trying to solve the same problem. Unfortunately, I will have to build a whole new pantry for strength, But I LOVE it!
Ian. ps and so will my wife.
LikeLike
Good luck to you! Thank you for your comment.
LikeLike
FANTASTIC! HOPE to do it as well!
LikeLike
I hope you’ll give it a try. I think you’ll be surprised at how easy it really is. Good luck!
LikeLike
my youngest children (twin boy and girl) have just graduated from high school. my sons are in college and my daughter is working. call it what you will but I’m sytematically organizing my house and purging all unneeded things. I’ve also put my husband and I on a diet. with our diet, my spice collection has become overwhelming. I’ve enlisted my father in law to help me build your spice rack. I will post pics and comments after. love the idea.
LikeLike
I look forward to seeing your photos! You’re going to love being able to have all of your spices in full view. I appreciate you sharing, as the whole reason for my blog is to motivate folks to try these projects that truthfully aren’t really all that difficult. Thank you!
LikeLike
Thank you for the tutorial. I had seen the picture on Pinterest but couldn’t find how to do it. Can’t wait to start !
LikeLike
Good luck to you, and you’re welcome!
LikeLike
[…] Another project that helped this kitchen function better was a very DIY-friendly pantry door spice rack. See how to make one for yourself here. […]
LikeLike
[…] http://www.thehouseofsmiths.com/2012/08/a-custom-dining-room-hutch-pretty.html DIY Pantry Spice Rack […]
LikeLike
Your tutorial is awesome. I’m (and by “I” I mean my husband) is going to be making this for me.
LikeLike
I’m excited for you! You’re gonna love it.
LikeLike
Hi Tracy – none of your picture links are working for me 😦
LikeLike
Oh nooooo! I’m not sure why. I went to the blog post and the photos are showing up for me. I’ll check into this! Keep me updated please. Have you tried any of the other posts on my blog to see if they’re working for you? I’d be interested to know if they are.
LikeLike
I checked with my son, who’s a “computer” person. He said everything is running smoothly with the post. He suggested the photos may not be showing up if you are using a different browser. He suggests using Internet Explorer or Chrome. I hope this helps!
LikeLike
They’re working now!
Very odd – but all good 🙂
LikeLike
Thank you for letting me know! Whew!
LikeLike
[…] from Home Staging Bloomington made this DIY pantry-door organizer, which holds spices and plastic bags in a beautifully organized […]
LikeLike
[…] from Home Staging Bloomington made this DIY pantry-door organizer, which holds spices and plastic bags in a beautifully organized […]
LikeLike
This is fantastic! I will be making one, or two.
LikeLike
Go for it! You’ll be so happy when it’s done and you can actually see all of your spices and other goodies easily.
LikeLike
[…] is the perfect solution to your spice problem; a vertical spice rack that fits perfectly on your pantry […]
LikeLike
What great ideas ! What great clear instructions ! What great photos ! Gonna get started on my pantry this weekend !
LikeLike
Thank you so much! It makes my heart sing to hear that the instructions were understandable enough that you want to give this project a try. I hope you’ll let me know how yours turns out. Good luck!
LikeLike
Tracy, I read and reread – the measurements of the top is 18″ – but what length do I have cut for the shelves? I have never done anything like this before and now I am super excited when you said Home Depot will do our cuts for us.
LikeLike
Tracy and the measurements of the bars that are holding them in as well. Sorry for two posts.
Thanks so much !
LikeLike
No problem at all, BertieRose! The measurements of the bars are 18″ on both the top and the bottom sections. They run the full with, so they are the same as the size of the beadboard underneath. Have fun with your project!
LikeLike
Oh oh. Home Depot only cut the beadboard for me. I’m not saying they won’t cut the other pieces, but I cut the rest of the wood myself. I hope this won’t deter you from trying this project! Miter boxes start at $10 and this is a very miter-box friendly spice rack because the wood is so thin and easily cut. I hesitate to give you the shelf measurements in case the wood you choose is a different thickness than what I used, because that will make it different, but here it goes…the shelves for the spices measure 17 1/4 inches. The bottom shelves that hold the garbage bags measure 16 1/2 inches because the side pieces are thicker. The best way to determine your shelf length is to make a square out of your top, bottom and side pieces and then measure the distance in between. The 17 1/4 measurement should work if you use the exact same pine mull casing that I used. Good luck and I hope this all makes sense!
LikeLike
Tracy! Just got back home with all my boards and hardware! Home Depot and Lowes both cut all my boards. It was $50.56 for everything except the glue and paint because I already have that.
Thanks so much!
Wish me luck.
Bertierose
LikeLike
That’s so awesome! Now I know that they’ll even cut the small boards. Thank you for sharing that with everyone and I hope your project is an enjoyable one!
LikeLike
Hey Tracy, we just completed our new pantry spic rack and we love it!! It has been a great help in freeing up space on our pantry shelves. We are experiencing one issue though, when opening the spice rack door, it begins to swing open, hitting the wall. For some reason when we open the door to retrieve spices, the door will not stay still. Any suggestion?
LikeLike
I have been obsessing about this project since I first discovered it and your great instructions. I am in the midst of a kitchen reno and knew it was do or die, put up or shut up. It was a long day and there are some imperfections which I am hoping paint will hide but I just love it and can’t wait to see it all loaded up. Thanks so much!
LikeLike
I’m SO happy for you! You will see that it’s life changing!!
LikeLike
Tracy – I have my spices in a drawer laying down, but you make me wish I had a door so I could build this. Not sure how I stumbled on your post, but so glad I did.
Not only is it a brilliant design, but I love your writing. It was so much fun to read. If I move again, I’ll definitely look into this as a solution to my spices, which I swear procreate and multiply in my drawers!
So sorry about your Mom, I lost mine in 2016 as well…
LikeLike
Thank you, Anahid! Maybe you could do a scaled-down version and put a couple of units inside some cupboard doors. Thank you for your comment!
LikeLike
Thank you for your very detailed instructions. I built my own spice rack and it turned out wonderful. I do have a question though—were you concerned about your pantry door sagging with the extra weight. I’m a little concerned that it might cause my door to sag under the extra weight.
LikeLike
Hello, Glenda! I’m happy that your spice rack turned out well. No, I didn’t have any concerns about my door sagging. If the door begins to pull away from the jamb, however, you could remove the screws on the top hinge and replace them with longer screws that will sink deeper into the jamb, pulling it tight. That should take care of the problem. Good luck!
LikeLike
[…] Found From Home Staging […]
LikeLike
[…] Image via: Home Staging in Bloomington Illionois […]
LikeLike
[…] via homestagingbloomingtonil.wordpress.com […]
LikeLike
Thanks so much! I too was full of fear about hanging a similar rack I built on a hollow door until I saw your post!
LikeLike
I’m so happy for you!! There really is nothing to it. I’m mad at myself for waiting so long to give it a whirl. Mine’s been up for about 2 1/2 years and it’s as sturdy as ever.
LikeLike
[…] homestagingbloomi … […]
LikeLike
[…] homestagingbloomi … […]
LikeLike
[…] homestagingbloomi … […]
LikeLike
[…] homestagingbloomi … […]
LikeLike
[…] homestagingbloomi … […]
LikeLike
[…] homestagingbloomi … […]
LikeLike
[…] homestagingbloomi … […]
LikeLike
[…] homestagingbloomi … […]
LikeLike
[…] homestagingbloomi… […]
LikeLike
[…] homestagingbloomi … […]
LikeLike
[…] homestagingbloomi … […]
LikeLike
[…] homestagingbloomi… […]
LikeLike
[…] homestagingbloomi… […]
LikeLike
[…] homestagingbloomi … […]
LikeLike
[…] homestagingbloomi … […]
LikeLike
i am going to do it . you where very good . thank you .i think my wife will love it
LikeLike
[…] homestagingbloomi… […]
LikeLike
[…] homestagingbloomi… […]
LikeLike
[…] homestagingbloomi… […]
LikeLike
[…] homestagingbloomi… […]
LikeLike
[…] homestagingbloomi… […]
LikeLike
[…] Source: homestagingbloomingtonil.wordpress.com […]
LikeLike
[…] homestagingbloomi… […]
LikeLike
[…] Check out this idea at Home Staging […]
LikeLike
[…] homestagingbloomi … […]
LikeLike
Tracy, my spouse required much more space for her spices. After scouring the web for ideas that might work, I came across your blog, and after some careful consideration and minor modifications, I built one. I would like to attach a picture, however I don’t see a way to do that. I used 1 x 3 lumber for the top and 1 x 4 lumber for the bottom. Additionally, 1 1/8 trim board was used to hold the spice jars/containers in place. I routed the back for the backing to fit within the rack so the edges were not exposed, then used a white pickle stain so the wood grain remained visible, thus softening the appearance of the rack against the door. Thanks for a great idea and my wife loves it! Let me know where I can sent the photo…
LikeLike
[…] I have always wanted to get a bunch of spices for cooking but didn’t want to make the kitchen look too cluttered. I love this look! Plus it even fits some other large items! Check out this idea at Home Staging […]
LikeLike
[…] . COM LILY ANN CABINETS . COM CHAYLOR & MADS . COM FIRST HOME LOVE LIFE . COM AMAZON . COM HOME STAGING BLOOMINGTON IL . COM SHOPSTYLE . COM ONE KIND DESIGN . COM SHOPSTYLE . COM DAILY MAIL . CO . UK HOME BNC . COM STYLE […]
LikeLike
I built mine this weekend with your post. Thank you for all the tips. I am in love with my new pantry door spice rack
LikeLike
I’m glad to hear this worked out for you, Melissa! Thank you for your comment.
LikeLike