
Don’t you just love those crisp, white kitchens with beautiful open shelving? I’ve been craving that look for my kitchen. And how wonderful to take dishes straight from the dishwasher, and put them in a place of honor. I’m happy to report that after finally saying farewell to the dishes I’ve had since 1980 (yikes!), I bought some simple white ones that I would love to be able to display.
But my kitchen is tiny, and although I love my fresh, white dishes, I can’t designate an entire 42″ cabinet to openly displaying them because I have lots of other not-so-beautiful stuff in with my dishes. You know the stuff I mean. I can’t seem to part with those plastic sippy cups from when my grown children were toddlers. And what about that random assortment of sentimental coffee mugs, and those all-too-ugly rusted metal baking pans stacked like the Leaning Tower of Pisa? Definitely all keepers. So, you see, I can’t just remove the doors from my current cabinets because of my meaningful junk.
But what I can do is make use of a blank corner that I’ve wanted to do something functional with ever since I relocated a cabinet that used to be there.
Today’s the day I build a “mini” version of my dream so I can have that same look, just on a smaller scale. A much smaller scale. I must confess, I’m a painter, not a carpenter. And I’m a girl! If I can do this, you can too. It’s very simple construction, and there’s really nothing to it. And if yours turns out not-so-great, you can use it in the garage for storage or give it to somebody for Christmas–someone you’re not real fond of.
I want my cabinet to be of the same construction as my existing cupboards so that they all look like they were born and raised together. Fortunately, I have paint that matches my other cabinets because I painted them a couple of years ago. (See previous post, “Yes You Can Paint Your Oak Kitchen Cabinets“) Here’s my empty space.


I decide to make my cabinet 1/2” smaller than the wall. Since my wall space is 15″, I decide to make the cabinet 14.5” wide. (As you can see, I’m a whizz at math.) I make it deep enough to hold the bowls and plates I’m itching to display.

First, I study how my existing cupboard is constructed. I can make it look identical, even though I’m not going to router the grooves for the back piece of the cabinet to slide into. No one will ever know it’s not made the same way. I won’t tell if you won’t.
Here are my materials. The 1 x 2’s are to form a back frame, and to trim out the front of the finished cabinet. The 1 x 8’s are for the sides and the shelves, and a scrap of bead board (not pictured) that I have left over from another project will form the back of the cabinet. I also use finishing nails that I already have on hand.
Note that my 1 x 8’s have knots and other imperfections in them. I buy lesser grades of wood for projects like this, and durabond over the knots and any other dings or imperfections so that it’ll be a nice, smooth finish when I’m done.

I would like to take this opportunity to show off my new saw horses that my son, Brandon, got me for Christmas. I love my saw horses. Space at my house is limited, so I love that they fold up so tiny and store in a very small space. They’re also adjustable with the flip of a bracket. Thanks, Brandon–I love you even more than my sawhorses!


So step one is to build a simple frame out of the 1 x 2’s as you can see in the center of the picture. I just used easy, peasy butt joints.

This frame is what I use to fasten the sides, top and bottom to in order to construct the actual cabinet. I simply hold up the 1 x 8’s against the sides of the frame, and nail them on with finishing nails. I use bar clamps since I’m doing this by myself, but a spouse, neighbor or other human being could hold the boards while you hammer if you promise not to hit their fingers. I also have done this without the bar clamps, so don’t let it discourage you if you don’t own any. I use wood glue so it’ll be a bit more sturdy, and so I can feel like a “real” carpenter. I measure so that the height of this cabinet is exactly the same as the height of my current ones – 42″.

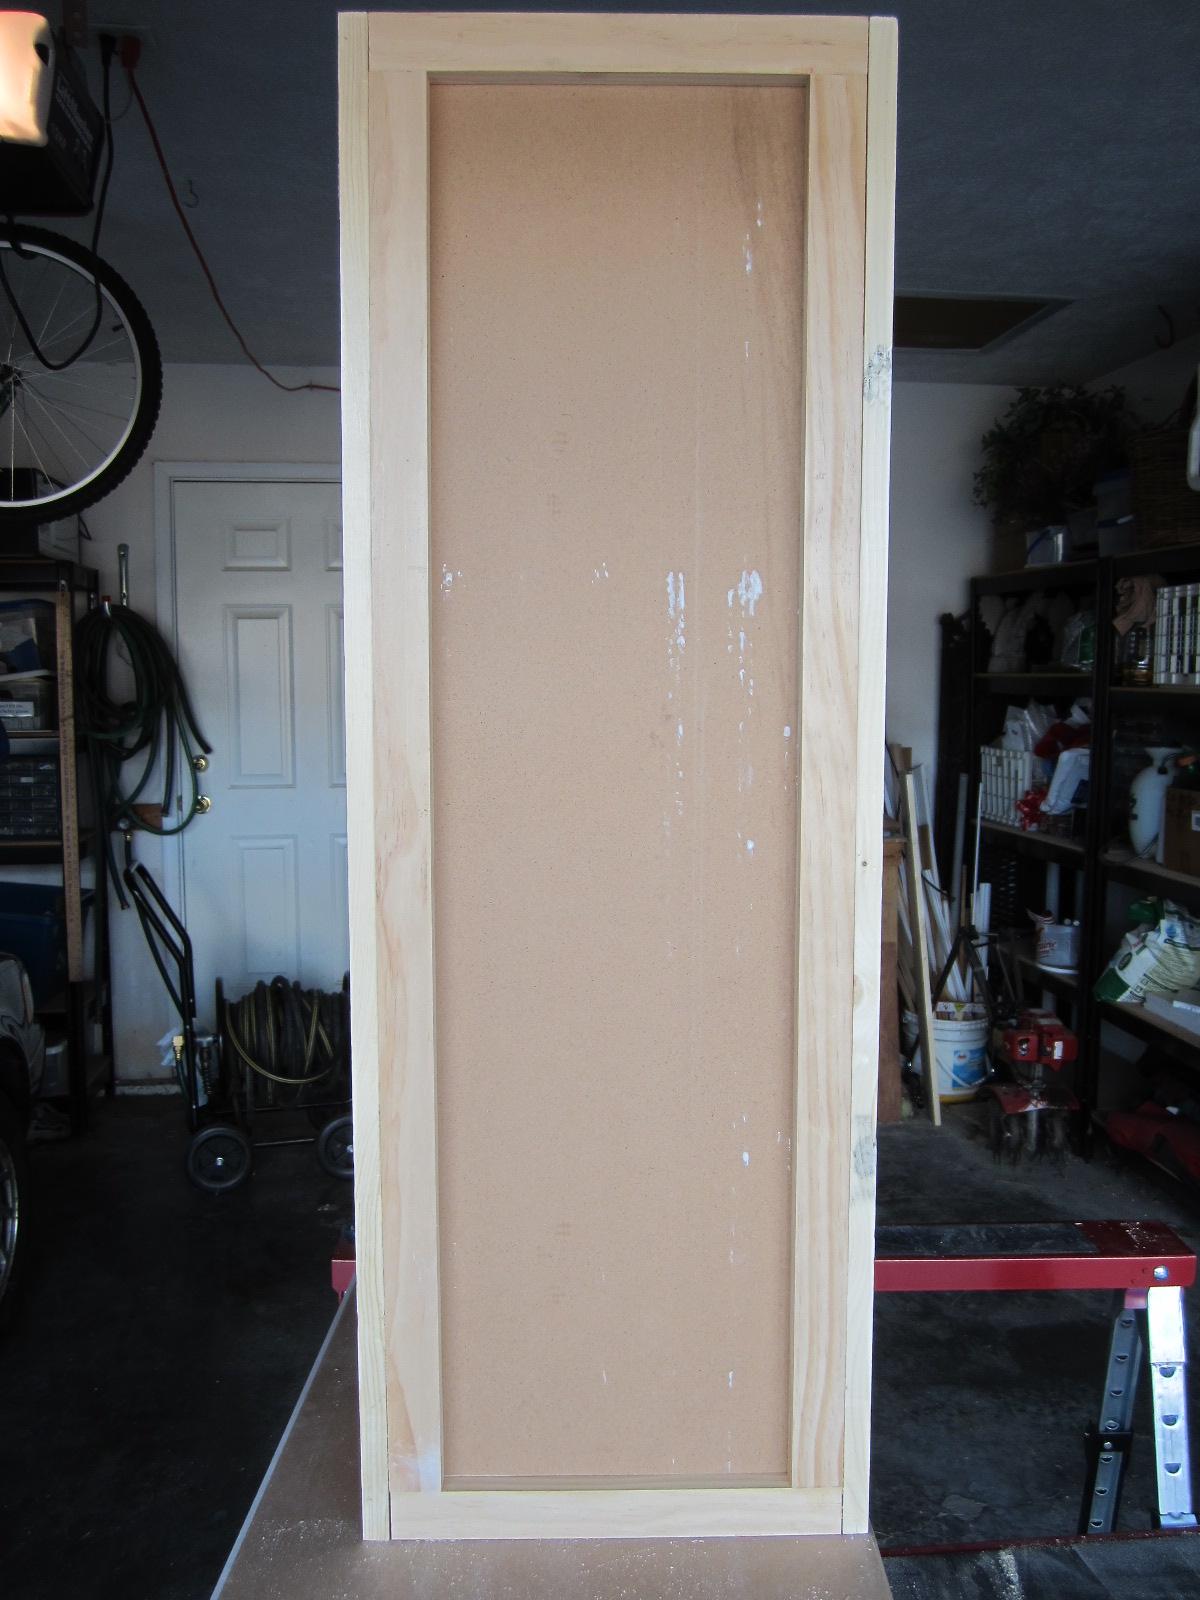
The 1 x 2 frame is also what the bead board plywood will rest on, and it’s what I drill through in order to attach the cabinet to the wall. Now what I have is this box with no back or front.


Next I measure my bead board plywood, cut it to size and drop it down into the box so that it rests on the 1 x 2 frame. I only loosely tack it in since the shelves will eventually butt up against it to hold it in place.

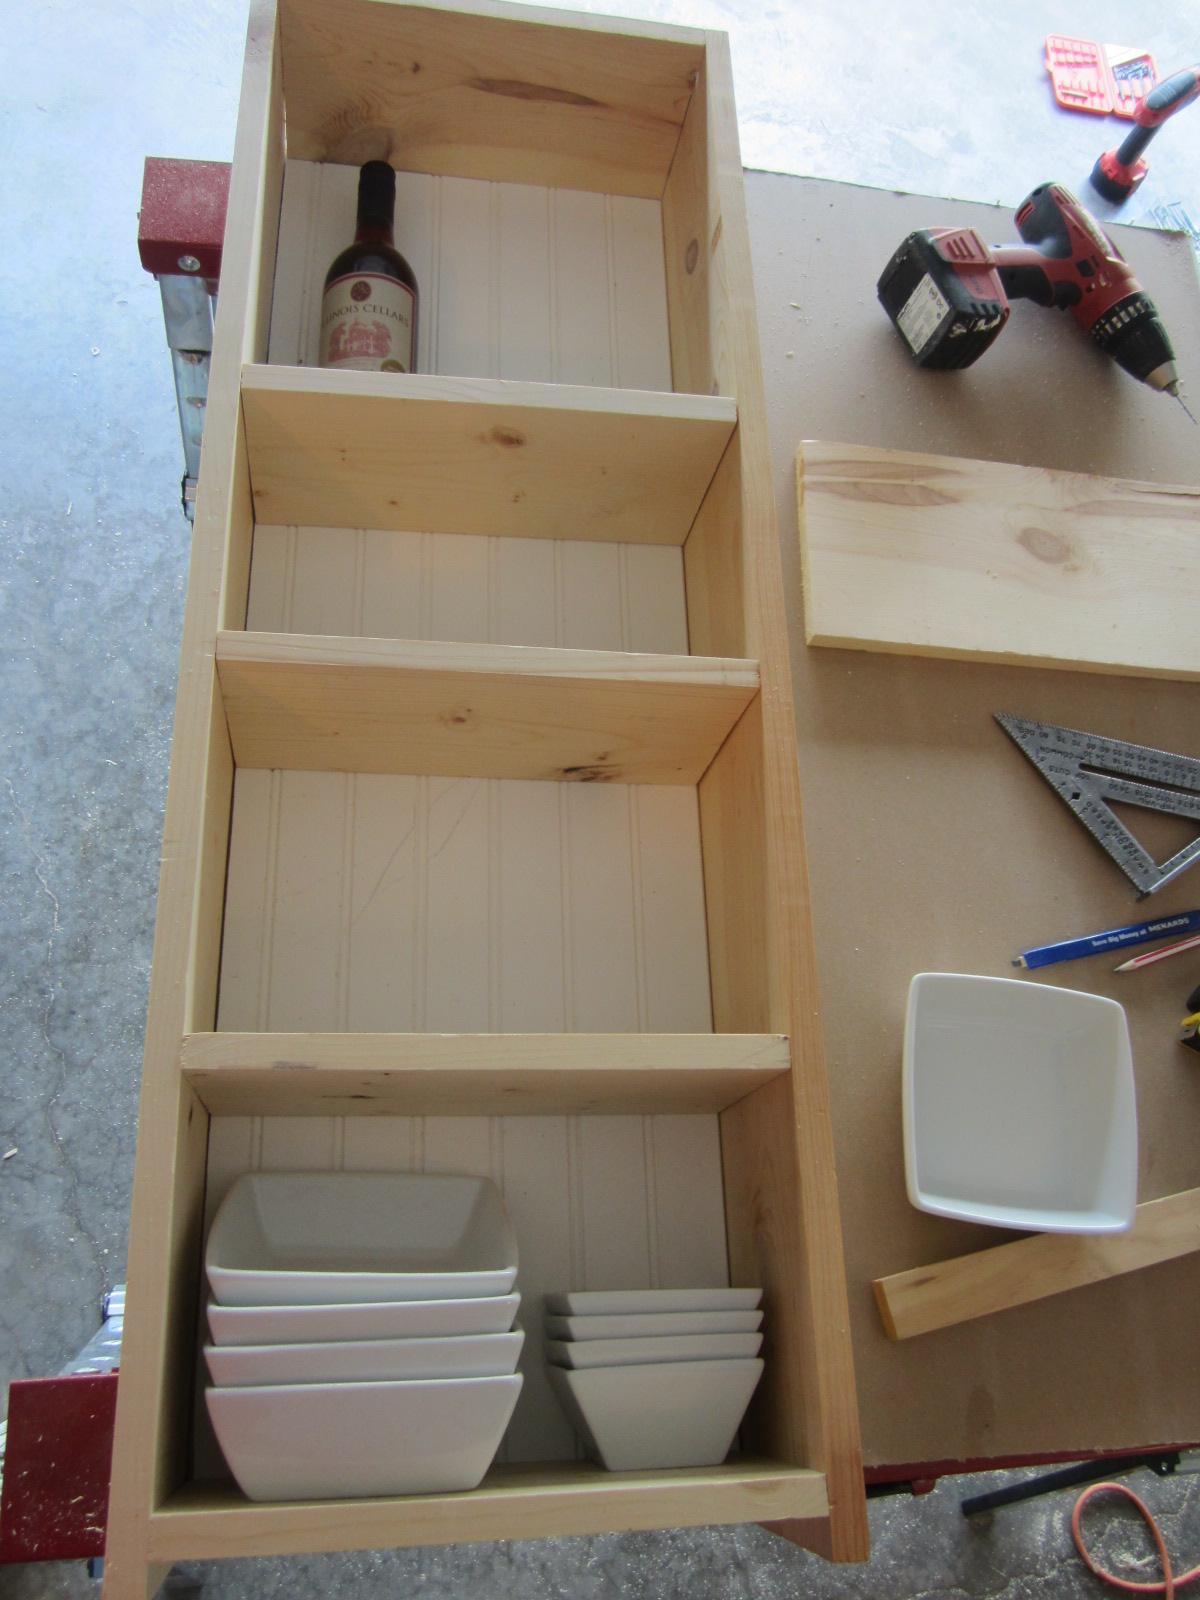
The next step is to decide where I want my shelves. I decide to make them permanent, and place them so that they fit the items I want to display. I want wine on the top shelf, and I decide how I want my dishes to stack on the remaining shelves. This cabinet will be located right above my dishwasher, so it’ll be nice to have so close when putting my dishes away.


I use a speed square, running it in both directions to make sure my shelves are exactly level front to back and side to side.

I tack in all the shelves without pounding the nails in all the way to be sure everything’s where it needs to be before I commit. Once everything looks peachy, I pound away. If you’ve read my other posts, you know I’m not gifted in the use of a hammer, so I pre-drill all my holes. (If there were a “Hammering For Dummies” book, I’d buy it.) It’s especially beneficial here to pre-drill, so the shelves don’t jump around while I’m hammering since they need to be perfectly level. Then I counter-sink my nails with a punch.

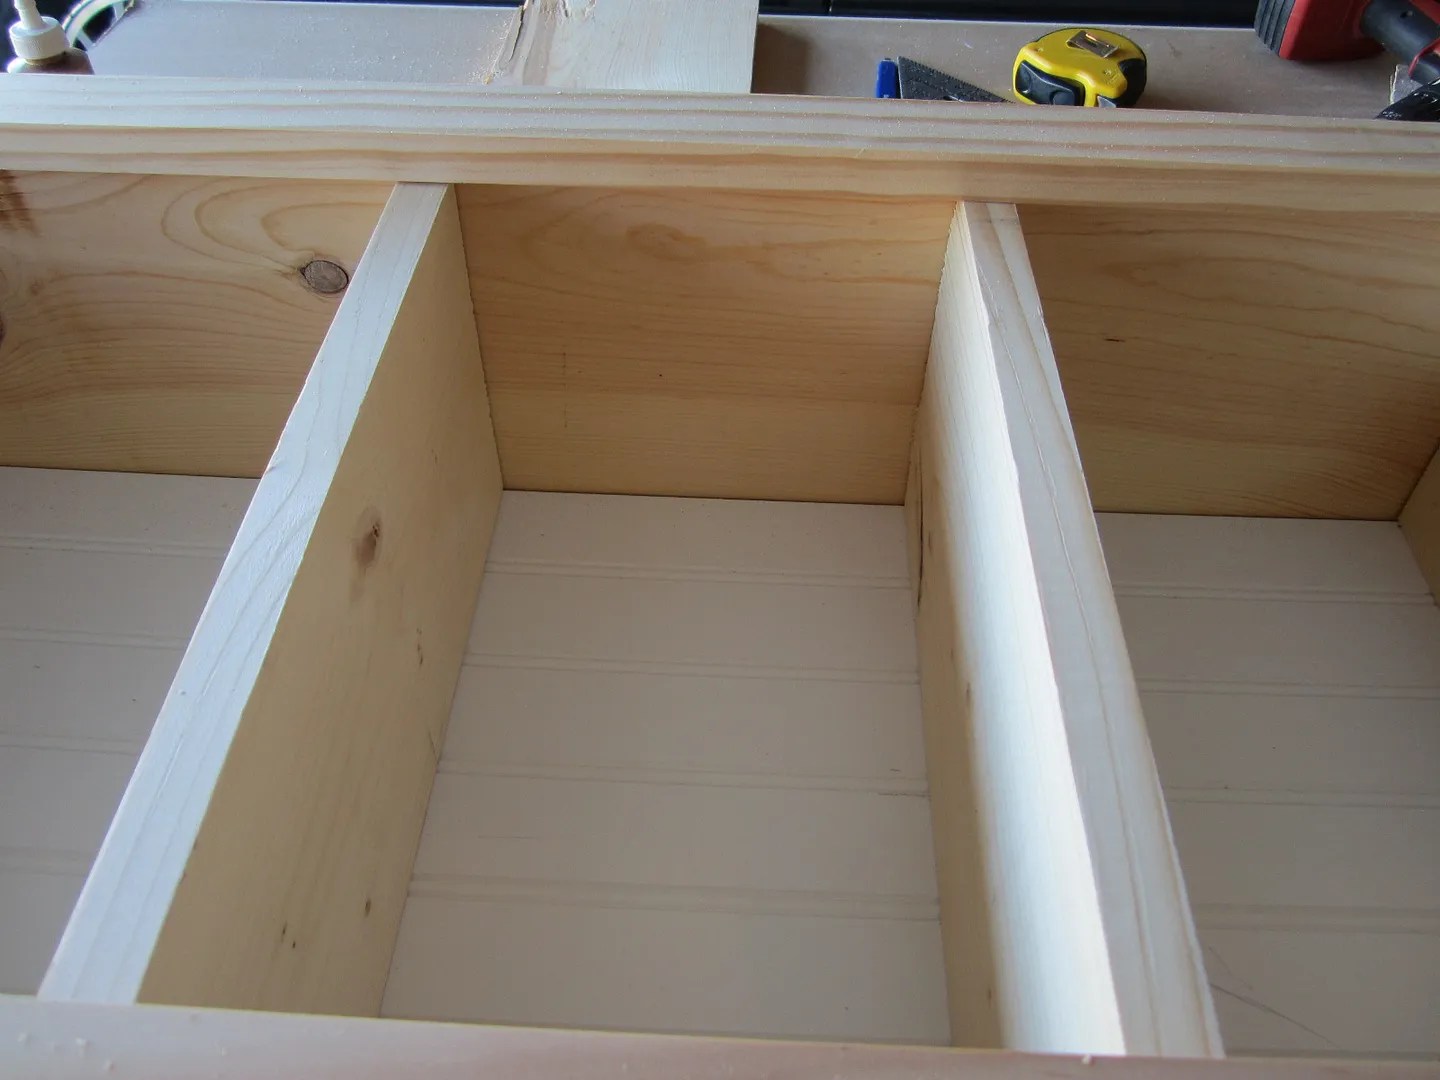
Next comes the 1 x 2 frame that sits on the face of the cabinet. This covers up the cracks where the shelves meet the side panels, and just gives the cabinet a more finished look. And more importantly, this is how my other cabinets are made.

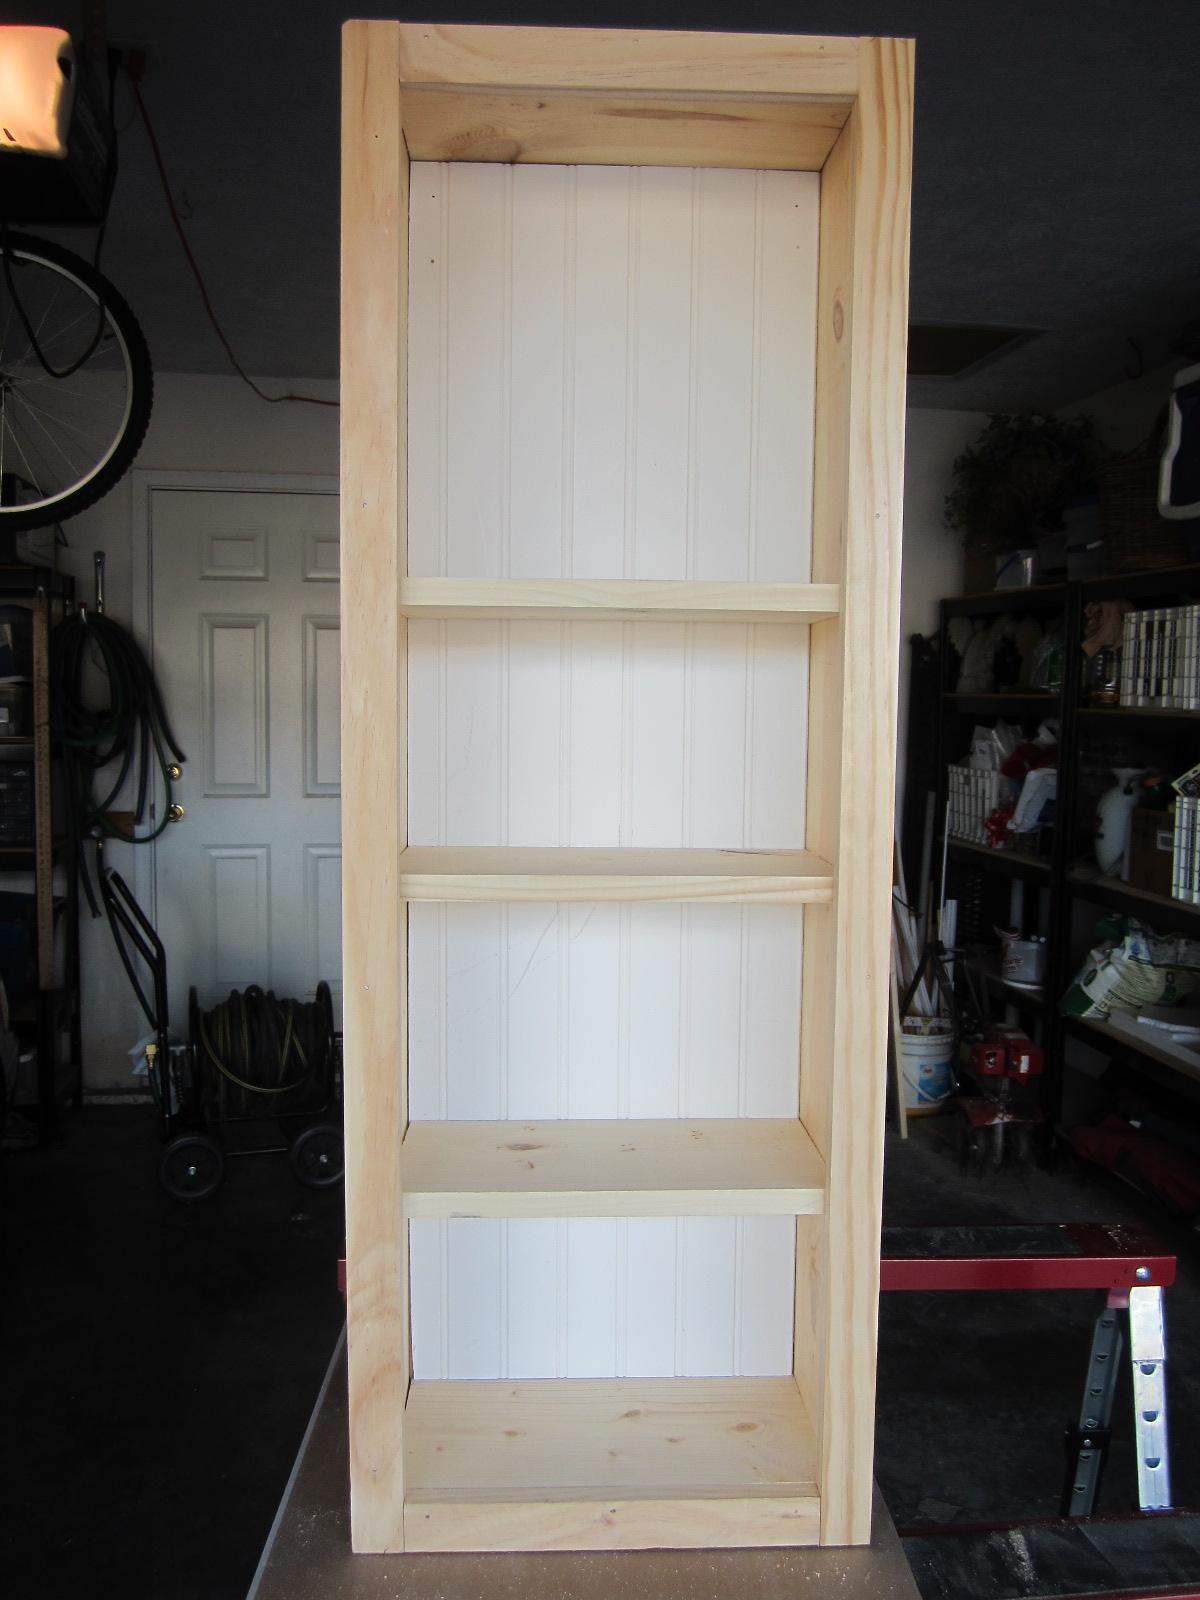
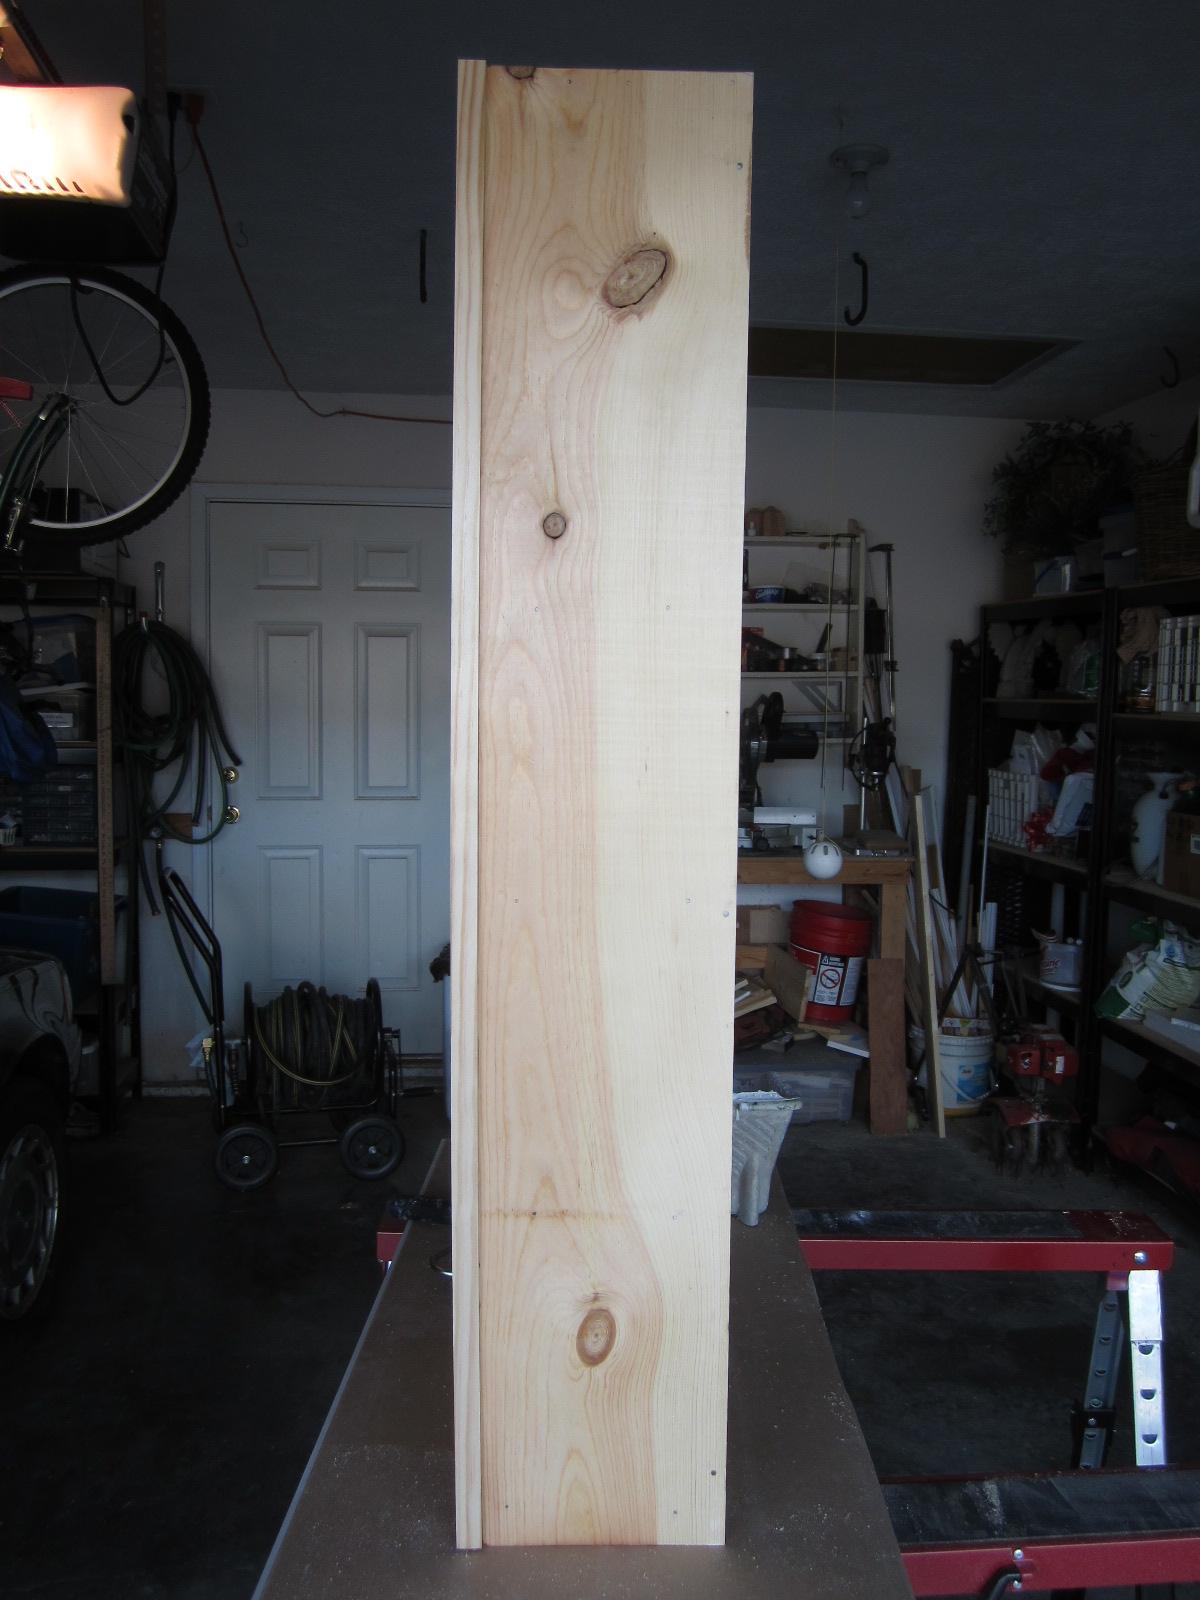
Here’s how it looks now. Front, side and back views. I must admit I surprised myself with the sturdiness of this cabinet. When you have the sides, top, bottom and the shelves all holding it together, it makes for a pretty solid piece of awesomeness. (Looks like someone needs to clean out their garage.)
Next I caulk all the cracks–every last one. That is, anywhere one board meets another. It looks much more professional when there are no cracks showing. If you don’t have visible cracks, it means all your cuts are precise (or that’s what we want people to believe). Now is also when I skim over the knots, dings and nail holes with durabond. You could use spackle as well. Sorry I got carried away, and didn’t take a picture of the patch job over the knots and dings. You’ll have to use your imagination.


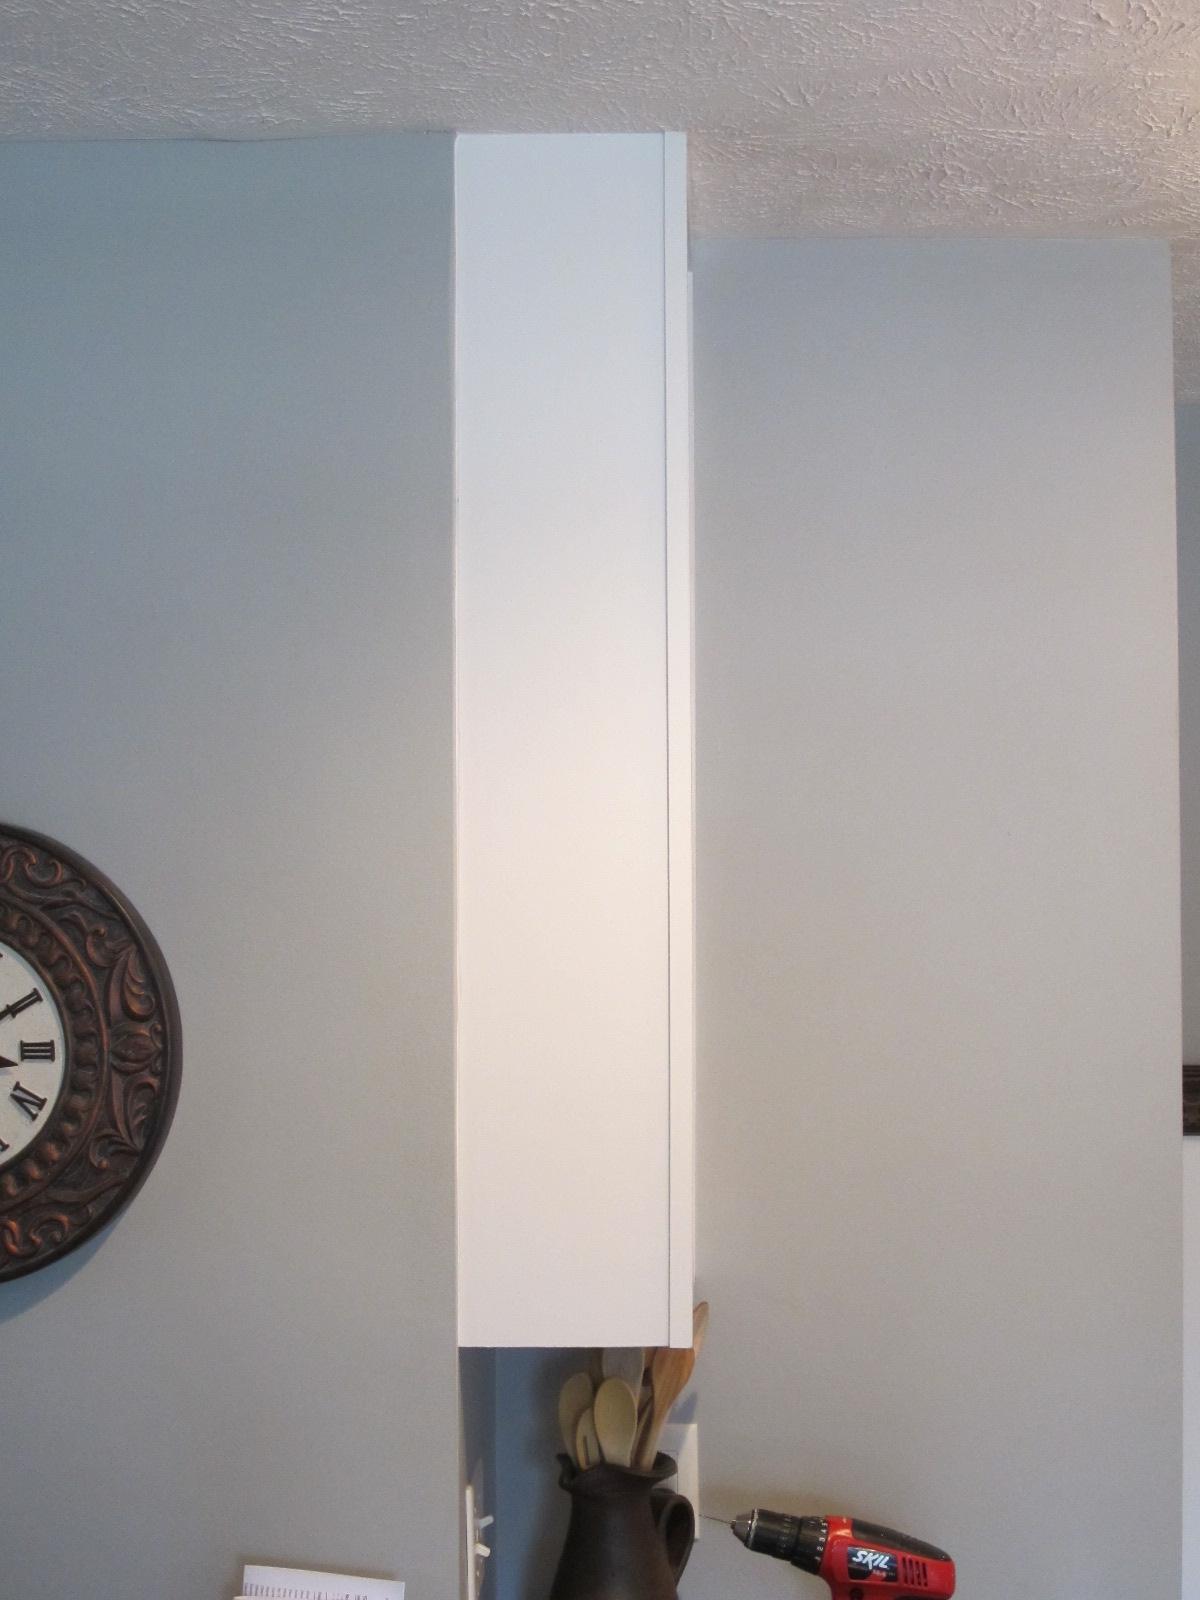
Here’s my shelf primed, painted and installed, but not quite finished.

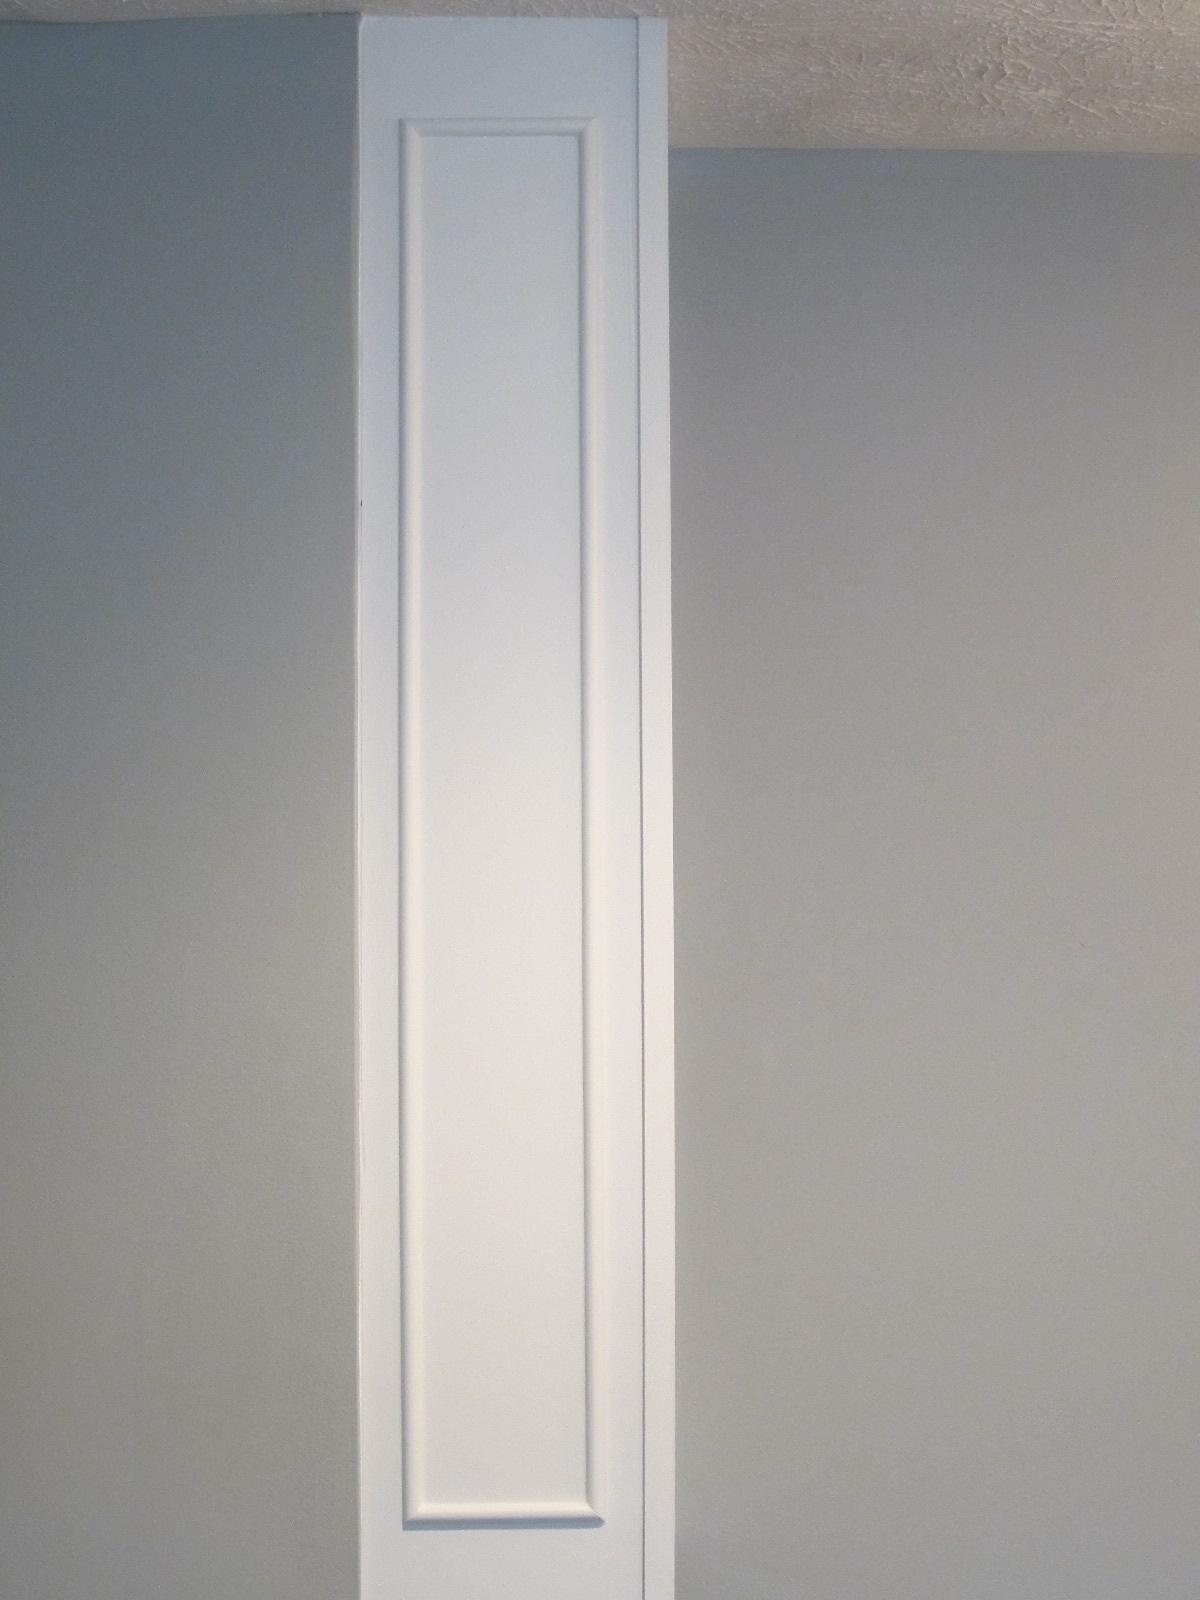
After living with my new cabinet for a week or so, I decide the side view is pretty boring so I buy trim, cut my 45’s and add some interest. It looks a little less home-made now. Much better!

Before fabulous trim–
After fabulous trim–
Here’s the bar code from the trim I bought from Menards.

Here’s my new open cabinet!

This project cost me $27. Keep in mind that I already had nails, bead board, caulk, paint and primer. Here are some before and after photos.
Before–
After–

Before
After
 How to Build a Simple Kitchen Cabinet for Open Display / HomeStagingBloomingtonIL

I love my new cabinet so much! When you have a kitchen with limited storage, adding a cabinet like this one, even though it’s not huge, makes a significant difference. Plus it’s just so darn cute! So of course when my friend, Rachael and I went to garage sales today, I bought a few more dishes–just because I could.
If you’re looking for other ways to add storage to your kitchen, visit my posts, “DIY Rolling Pantry Tucks Into Space by Fridge“, “Creative Kitchen Storage for Pot Lids” and “Organize My Kitchen Pantry With What?!“.
This post was written by Tracy Evans who is a Certified Home Stager, Certified Redesigner and Journeyman Painter servicing the Central Illinois area. Feel free to visit her website at www.HelpAtHomeStaging.com to view her portfolio for more before and after pictures of her projects. And if you enjoy gardening, you may want to visit her gardening blog at MyUrbanGardenOasis.


Hi Tracy !
How is life treating you??? I love reading your “how to’s” VERY GOOD JOB !
Creatively yours, Lyn Westhoff, Certified Redesign Specialist (CRS)
Certified Staging Specialist (CSS)
Home Enhancement Specialist (HES)
Faithful Organizers Member
Apprentice Faux Finisher
~Creating Positive Spaces for People !
Description: Description: cid:image002.jpg@01CCB89C.48CC2890
http://www.freshimpressions.org ~ 309.825.3368 ~
LikeLike
Hi, soo stinkin cute, this is exactly what I needed to plan out a much larger unit, bead board and all, but how did you attach it to the wall? I know you said the 1×2 frame is what the bead board will sit on and what you will drill through to attach it to the wall, but then you would have drilled through the bead board also…right? Hmmmm
LikeLike
I used long screws and screwed thru the bead board, the 1 x 2 frame and into studs. If you screw in towards the very top, you’ll hit the upper horizontal studs so you don’t need to locate the vertical ones. Although if you’re making a large cabinet, you may want to consult google or your favorite carpenter to find out how close together you would need the screws in a larger cabinet–or look at how your cabinets are currently installed. I can sense your concern about the installation screws showing, but I painted them white, and they disappear pretty well. Plus mine are covered pretty much by wine bottles and dishes. An alternative method would be to countersink your screws just below the surface of the bead board, and putty over them. Countersink bits for a drill aren’t that expensive. I actually own some, but never thought to sink mine at the time. Another suggestion would be to go the adjustable-shelf route, and you could install the partially constructed cabinet by the 1 x 2 frame, then tack up your bead board with a couple tiny finishing nails, then drill holes on the side boards for the adjustable shelf hardware and add shelves. I’m not talented enough to get my holes exact enough for perfectly level shelving, or I would have done that myself! Thanks for your comment, Jennifer. Good luck with your project!
LikeLike
I have to ask what saw horses are those? Good job also.
LikeLike
The fantastic saw horses my son got for me were purchased at Menards and the brand is “Tool Shop”. Love them!
LikeLike
Great post! Thanks for the pictures and explanations. This will be my weekend project!
LikeLike
I’m glad you found the post useful! Good luck with your project.
LikeLike
Your kitchen is giving me serious inspiration for my own renovation project!
LikeLike
I’m glad to hear it! I wish you the best.
LikeLike