I once built a wall-mounted clothes-drying rack that I loved. Then I moved. The drying rack stayed with the house, but as it turned out, the one I left behind wouldn’t have worked in my new laundry room anyway. So I built another one—completely different from the original one—that’s better suited to my current space, and here it is.

If you’ve done some research on wall-mounted drying racks, you probably know that racks like these at Pottery Barn and other high-end retailers sell for anywhere from $100 on up. I recently saw one that sold for $350. Lordy. If you have a drill and a saw of some sort—even just a miter box—you can make one for yourself for much less. Much less.
You’ll need some wooden dowels, 1 x 2 pine, 1 x 3 pine and some beadboard that can be cut at your local box store if you don’t have a jig saw or table saw to cut it with.

I used mostly scrap wood for this project, as you can see by my chopped up beadboard. The size of my drying rack was based on the length of some wooden dowels I already had, as well as the size of my leftover beadboard piece.
The frame that held the dowels was made from 1 x 2’s. I made the dimensions of the inside of the frame 2″ shorter than the length of the wooden dowels so that the dowels could be inserted 1″ into the frame on each side.

I drew lines on the sides of my 1 x 2’s (on the one inch side) so I would know where to drill the holes for the dowels. You can decide what spacing works best for you, but I placed my dowels 3 1/4″ apart on center.

Drilling the holes in the trim was the most difficult part of this project because the wood I was drilling into wasn’t much wider than the dowels I was using. Here’s a photo of the finished frame, and there’s only about 1/8″ to 3/16″ of excess wood remaining on each side of the dowel. (Whew!) In the interest of frazzled-nerve prevention, you may want to consider your dowel thickness in comparison to the width of your frame pieces when you’re purchasing your supplies.

You’ll want to use a spade bit or a brad point bit so the bit doesn’t “walk” while you’re trying to drill.
If you don’t know what a spade bit or a brad point bit is, the next photo shows a spade bit. If you don’t have much experience with a drill, you may want to drill a tiny hole first in the exact center of your piece of wood where you want the dowel to go. This gives you a “sturdy” place to put the tip of the actual dowel-sized bit for precision’s sake. You also may want to put a piece of tape on your bit as a depth guide so you don’t drill so deep that the point of the bit pokes through the other side. That would be very sad.
A brad point bit (google it) would have been the way to go here as the point on a brad point bit is much shorter than the point on a spade bit which means less chance of accidental “impalement”.
Unfortunately, I didn’t have the size I needed in a brad point, and I wasn’t going to make a trip out to get one when I was on a roll. I find having to leave for supplies in the middle of a project to be immensely irritating, so I usually make due with what I have.


I used a Kreg Jig to drill pocket holes in the frame that held the dowels, but you could easily make a frame without pocket holes by simply nailing or screwing these pieces together. I put glue in each dowel hole and on each butt joint of the frame.
Note: It’s easier to spray paint your dowels before assembling. I chose to spray paint mine with interior/exterior paint, so they’d be protected from the dampness of the wet clothing I’d be drying. Quite honestly, it would have been easier to prime and put one coat of paint on all of the pieces before assembly, and then one quick coat after assembly, but I wasn’t in a painting sort of mood. I will admit, I regretted said mood when I had to paint around all those dowels where they attached to the frame three times (one coat of primer and two coats of paint).

The second section of the drying rack consisted of trim pieces glued, and then nailed (from the back) to a piece of beadboard paneling. The trim size doesn’t really matter, but I would recommend something with a thickness that measures at least 1/2 inch because a nail will be driven through the side of it as you’ll see shortly. I used what I had on hand for this, which happened to be a combination of some leftover trim and some scraps of mull casing.

Next came a simple frame made from 1 x 3’s that surrounded the beadboard section. I screwed the four side pieces of the frame together, countersunk the screws, puttied over them and primed and painted all the pieces.

 .
.


After I painted, I attached the 1 x 3 frame to the bead board section by nailing through the side of the frame and into the trim that was attached to the beadboard.
I added a piece of wire that I sprayed white, to allow the rack to hang open. The next two photos are of the back side of the frame.


I added some white hooks to the back beadboard piece to catch the wire so the rack could be held in place when extended, and I added a pin that I salvaged off of who-knows-what, to hold the rack closed when not in use.
After a ridiculous amount of wishy-washyness, I decided not to hinge the two pieces together, so they remained two separate pieces. I didn’t like the idea of the pin part of hinges showing on the bottom of the rack, and I decided if I wanted to add hinges later, I could.


Here’s how the pin works when it’s all put together.

To mount it, I located the studs in the wall, and then drilled through the trim, the beadboard, the drywall and into the stud. I counter-sunk the screws and patched and painted over them. I hope nobody ever wants to remove this drying rack because finding the puttied and painted screws again is gonna be a son-of-a-gun.
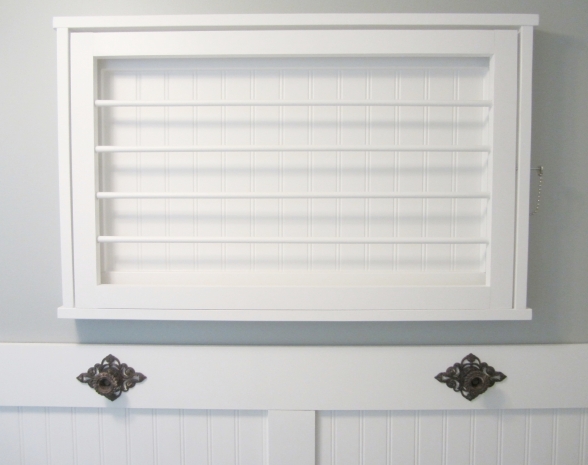
Here’s the finished product.

I must admit the original drying rack that I made and gave up for adoption was easier to build than this one—mainly because I didn’t have to drill any holes for dowels, and I only had to build one frame instead of two. It also was able to hold many more pieces of laundry than this one—even a queen sized comforter! But since becoming an empty-nester, my household laundry volume has taken a plunge, and now I mainly just need something for unmentionables, and a sweater or two. It’s perfect!
This post was written by Tracy Evans who is a Journeyman Painter and Certified Home Stager/Redesigner. If you enjoy gardening, you may want to visit her gardening blog at MyUrbanGardenOasis.Wordpress.com.

